
Select Subject (AI)
Let the offline AI select the people or main object in a photo and mask the background in one click (Supporter), its options, what to do next, and Select Sky (AI for Supporters, a simpler method in the free version).
Select Subject uses AI to find the people or the main object in your photo and select them in one click — no careful lasso work. It can also hide the background with a mask straight away. The AI runs on your own computer; your photo is never uploaded. Supporter
Where to find it
- Select › Subject
- The Select Subject button in the options bar of the Magic Wand and the Quick Selection Tool (W)
- ✦ Select Subject in the Properties panel, in the subject mask refinement section, together with its settings
- The Remove background tile on the Home screen: pick a photo and SnazzyFoto opens it and runs Select Subject for you
In the free version
Select Subject is a Supporter feature. In the free version, a Supporter feature window appears instead:
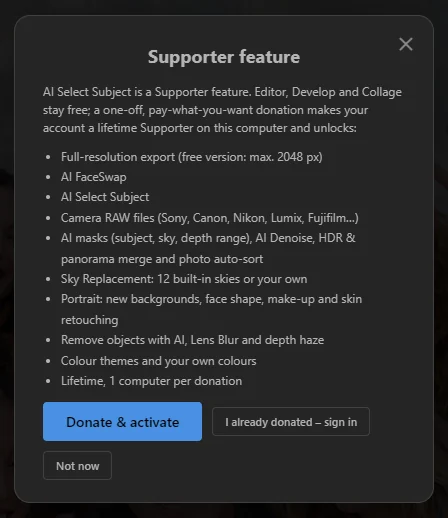 123
- 1 Donate & activate — donate any amount from the minimum and unlock SnazzyFoto on this computer.
- 2 I already donated – sign in — for when you have donated already.
- 3 Not now — closes the window.
See Supporter for how donating works. Everything else on this page, including Select Sky (without the AI), works in the free version too.
Select the subject
- Open a photo.
- In the Layers panel, click the layer that should get the mask — usually the photo itself. The AI looks at the whole visible picture.
- If you like, set the options in Properties first (see below). The defaults work well for most photos.
- Choose Select › Subject. Analyzing subject… appears while the AI works; this takes a few seconds.
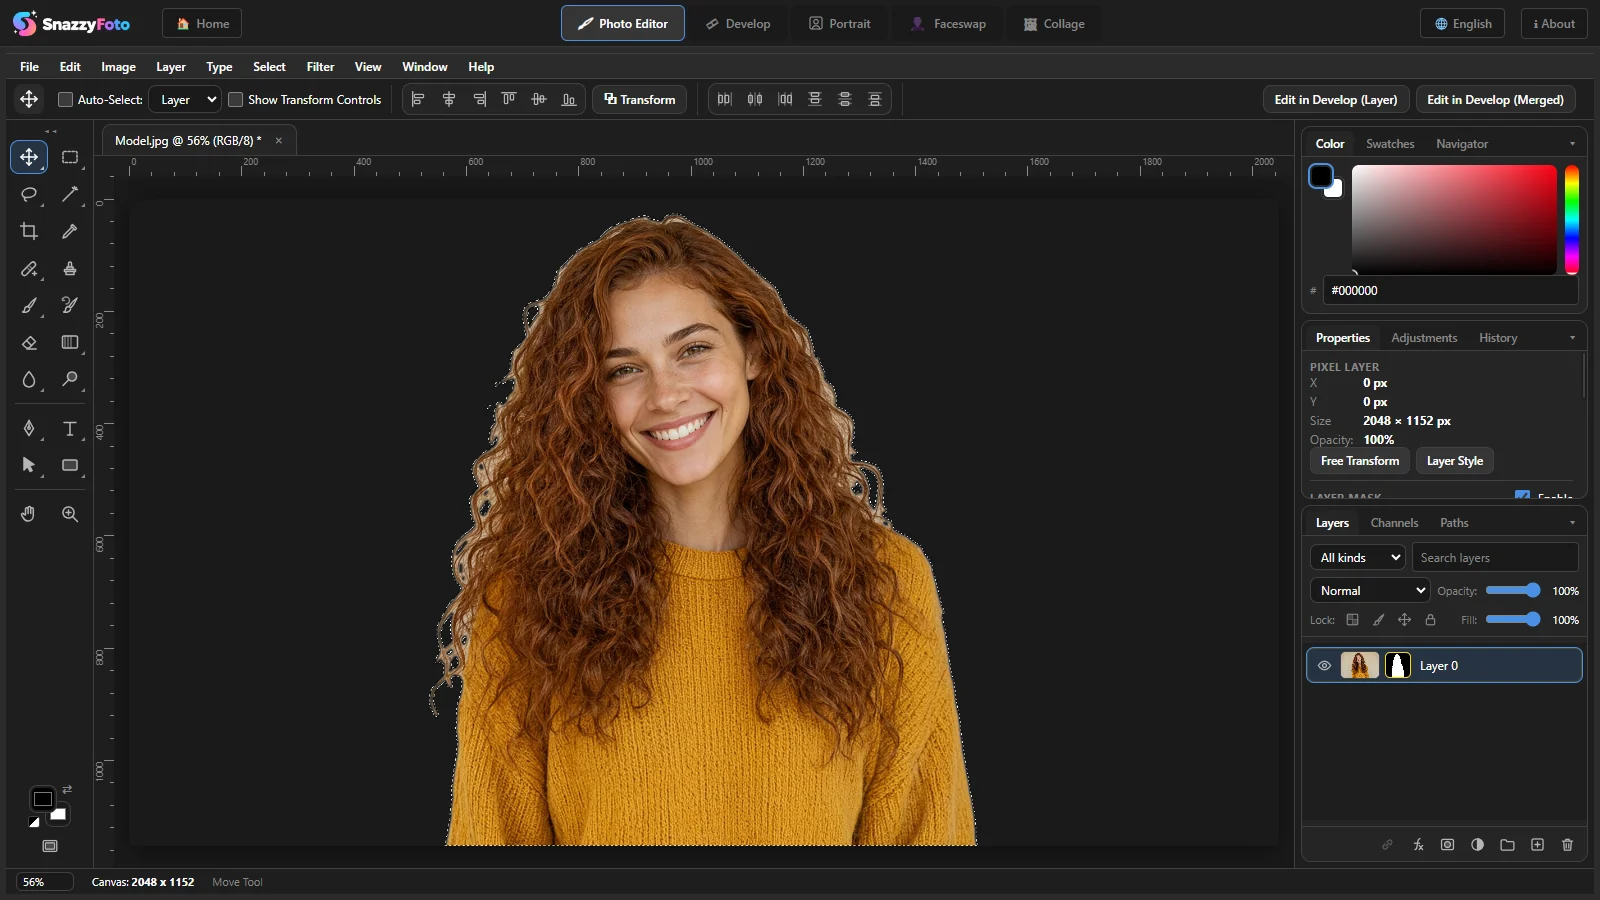
- The subject is selected. With Create Mask ticked (the default), the layer also gets a mask: the subject stays visible and the background is hidden.
 1
1 The new mask on the photo layer. White is what stays visible.
Options
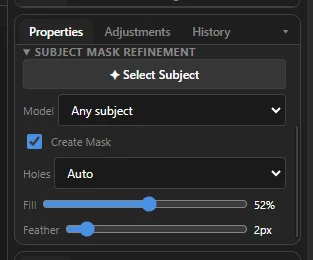 123456
- 1 ✦ Select Subject — runs it with these settings.
- 2 Model — Any subject (the default) finds people, animals or objects. People (fine hair) is made for people and keeps loose strands of hair better; try the other one when the first gets a photo wrong.
- 3 Create Mask — when ticked, the active layer also gets a layer mask. Untick it if you only want the selection.
- 4 Holes — what to do with gaps inside the subject, such as between an arm and the body. Auto fills small gaps and keeps larger ones, Preserve keeps every gap see-through, and Solid fills every enclosed gap.
- 5 Fill — how strongly small gaps and rough bits along the outline are closed (0–100%). It has no effect with Preserve.
- 6 Feather — softens the edge, in pixels (0–24). Raise it for hair or a soft background blend.
What to do next
- Put a new background behind the person — add Layer › New Fill Layer › Solid Color… or another photo with File › Place Embedded…, then drag that layer below the photo in the Layers panel.
- Fix the edges — paint on the mask: the Brush hides more, the Eraser brings parts back (see Paint on a mask).
- Work on the background instead — choose Select › Inverse (Shift + Ctrl + I), then blur it, darken it or change its colour.
- Copy the person onto a layer of their own — untick Create Mask, run Select Subject, then press Ctrl + J.
- A softer edge — raise Feather and run Select Subject again.
For a new background behind a person — a colour, a blur, a sky — the Portrait module is quicker: it cuts the person out and cleans the edges in one click. To brighten or recolour just a person or just the sky in a whole photo, the AI masks in Develop are often quicker. See Masks in Develop.
Select Sky
Select Sky selects the sky in a landscape or outdoor photo. For a Supporter the AI finds the sky, also behind trees and buildings. In the free version it uses a simpler method without AI: it looks for bright, even areas that touch the top edge of the picture.
- Choose Select › Sky, or click Select Sky in the options bar of the Magic Wand or the Quick Selection Tool (W).
- The sky is selected. If SnazzyFoto can't find one, the status bar says No sky found.
- Use the selection, for example: add a Hue/Saturation adjustment layer to make a blue sky deeper (it gets a mask in the shape of the sky).
Without the AI it works best on a clear or evenly clouded sky. Trees, buildings and busy clouds can be missed or added — fix that with the Magic Wand or Lasso while holding Shift (add) or Alt (subtract). To replace the sky completely, use Sky Replacement in Develop Supporter.
If it doesn't work
"Select Subject failed" appears.
The message has details underneath. Most often the AI files that come with SnazzyFoto are missing or damaged, for example after an interrupted install. Install SnazzyFoto again and try once more. See Fixing common problems.
It selected too much or too little.
Try the other Model, change Holes, or fix the result by hand: Shift + Lasso to add, Alt + Lasso to remove, or paint on the mask.
I donated, but the Supporter window still appears.
Open Help › Support SnazzyFoto… and click I already donated – sign in. See Supporter.