
A tour of SnazzyFoto
The top bar, the five modules and how each one is laid out, the Photo Editor's menus and status bar, and where to find Help, About and the language.
SnazzyFoto is one window with five modules: the Photo Editor, Develop, Portrait, Faceswap and Collage. A bar along the top switches between them. This tour shows what is where, so the rest of this Help Center is easy to follow.
The top bar
 12345
- 1 The SnazzyFoto logo — click it to open the Home screen.
- 2 🏠 Home — also opens the Home screen.
- 3 Module tabs — Photo Editor, Develop, Portrait, Faceswap and Collage. Click one to switch.
- 4 🌐 Language — shows the current language. Click it to pick another one; it changes at once. See Language.
- 5 ℹ About — the version, the language and your licence.
Switching modules never closes anything. Each module keeps its photo and settings while you work in another one, so you can go back and forth freely. To take a picture from one module to another, use Send to… (see Send a picture to another module).
The Photo Editor
The Photo Editor is for editing a picture in layers. It is the module behind the Home screen when SnazzyFoto starts.
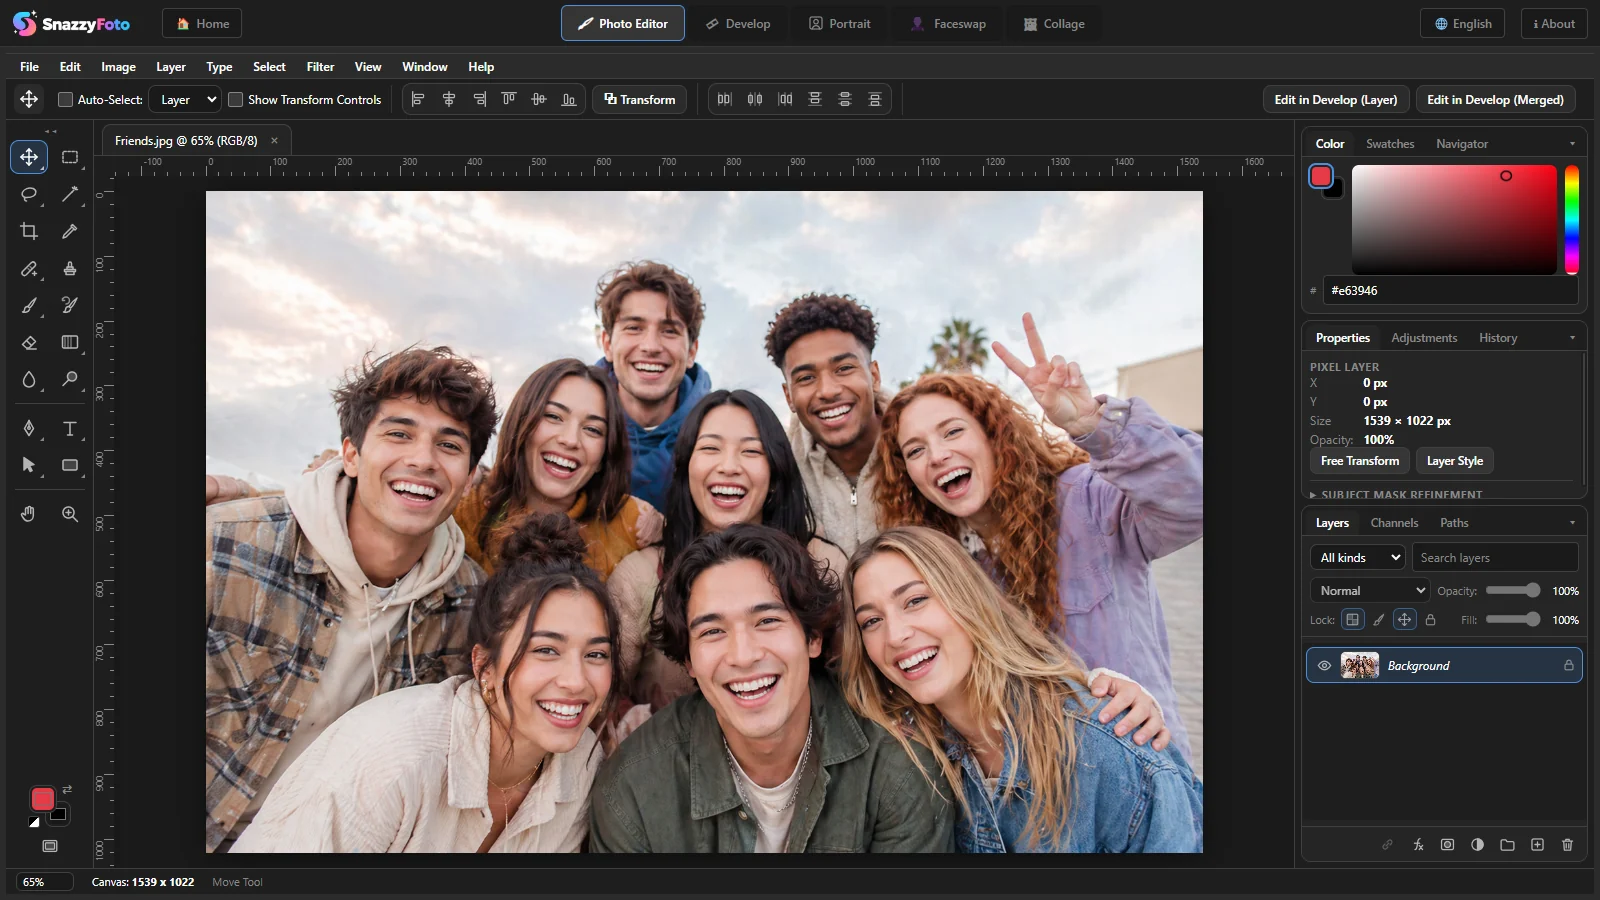 1234567
- 1 Menus — File, Edit, Image, Layer, Type, Select, Filter, View, Window and Help. Each command shows its keyboard shortcut next to it.
- 2 Options bar — the settings of the tool you are using, such as the brush, its opacity and flow, or the font.
- 3 Toolbox — move, select, crop, healing, brushes, eraser, gradient, text, shapes, the Pen and more, with the foreground and background colours at the bottom. Buttons with a small triangle hold more tools: right-click them. See Tools and shortcuts.
- 4 Document tab — the name of the picture and its zoom.
- 5 The picture — with rulers along the edges.
- 6 Panels — three groups of tabs: Color, Swatches and Navigator; Properties, Adjustments and History; Layers, Channels and Paths. F5 adds Brush Settings and Brushes.
- 7 Status bar — the zoom (type a number to change it), the canvas size in pixels, a hint for the current tool, and in the free version Free version: export max. 2048 px.
Before you open a picture, the middle shows three big buttons: New Canvas, Open Image and Load Project. To learn the Photo Editor, start with Photo Editor basics.
Develop
Develop is for light and colour. It never changes your original file: your settings are kept for each photo, and you export a new file when you are done.
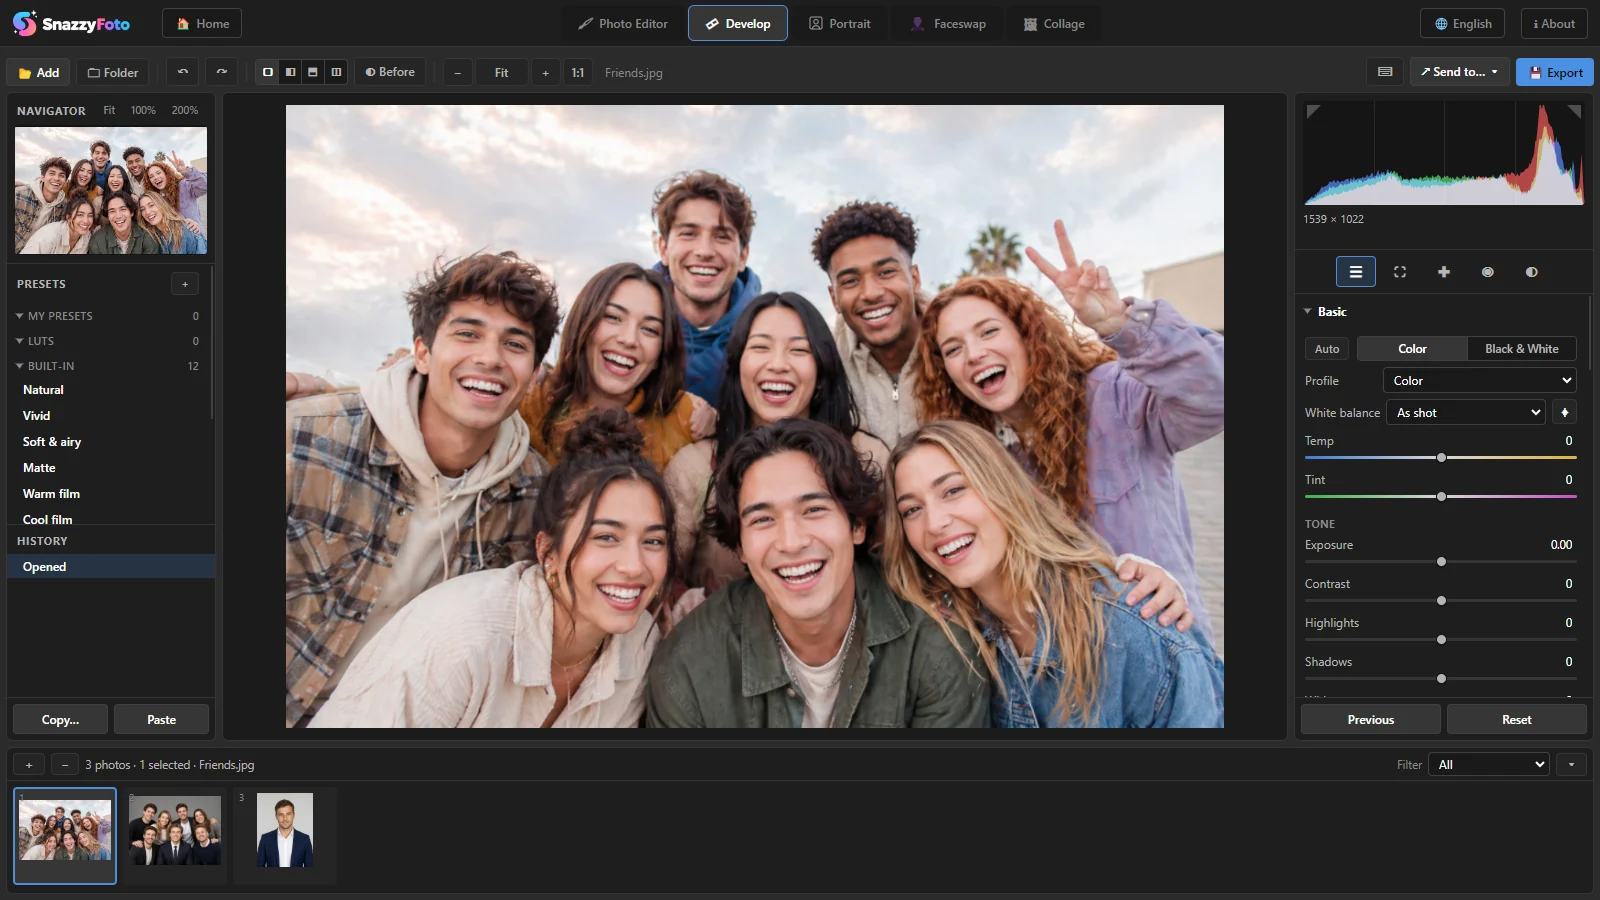 123456789
- 1 Toolbar — add photos or a folder, undo and redo, before/after views, zoom, and on the right ↗ Send to… ▾ and Export.
- 2 Navigator — the whole photo, small; it shows which part you see when you zoom in.
- 3 Presets — ready-made looks, your own presets and LUTs.
- 4 History — every change you made; click one to go back to it.
- 5 The photo.
- 6 Histogram — how bright the photo is, from dark on the left to light on the right.
- 7 Tools — edit, crop, remove spots, red eye and masking.
- 8 Panels with the sliders: Basic, Tone Curve, Color Mixer and more.
- 9 Filmstrip — every photo you added, with stars, flags and colour labels. Click one to develop it.
Press Ctrl + / or click ⌨ in the toolbar to see all of Develop's shortcuts. To learn Develop, start with Develop basics.
Portrait
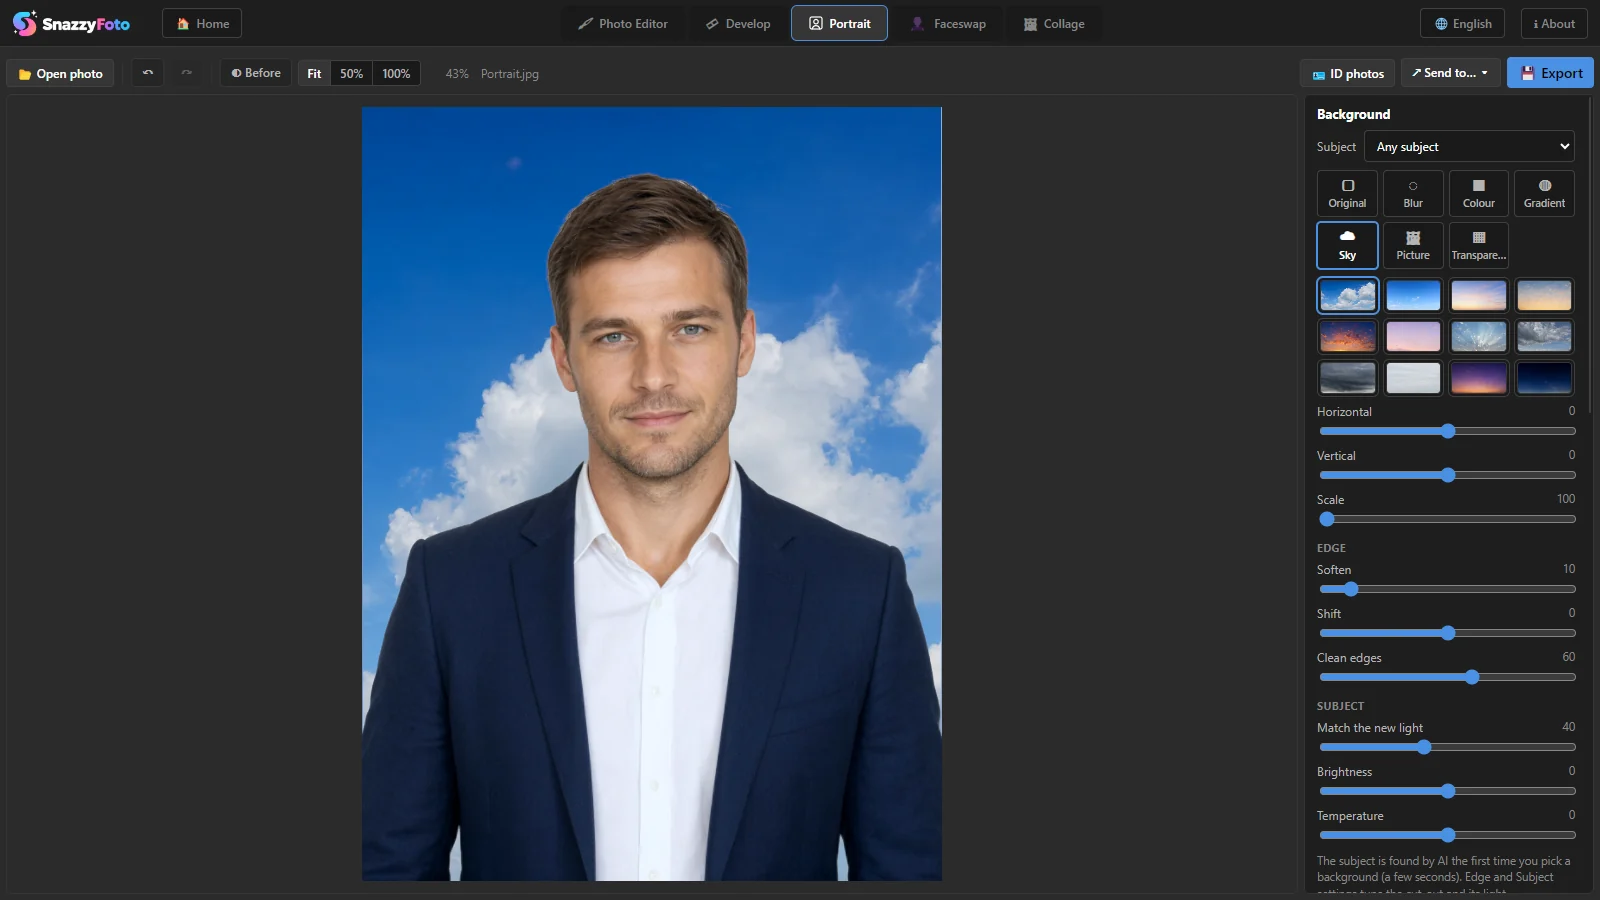
Portrait is for photos of people. The toolbar along the top opens a photo, undoes, compares ◐ Before, zooms, and on the right has ID photos, ↗ Send to… ▾ and Export. On the right are the panels: Background (blur, a colour, a gradient, a sky, your own picture or transparent), then Face shape, Make-up and Skin & eyes. See Portrait.
Faceswap
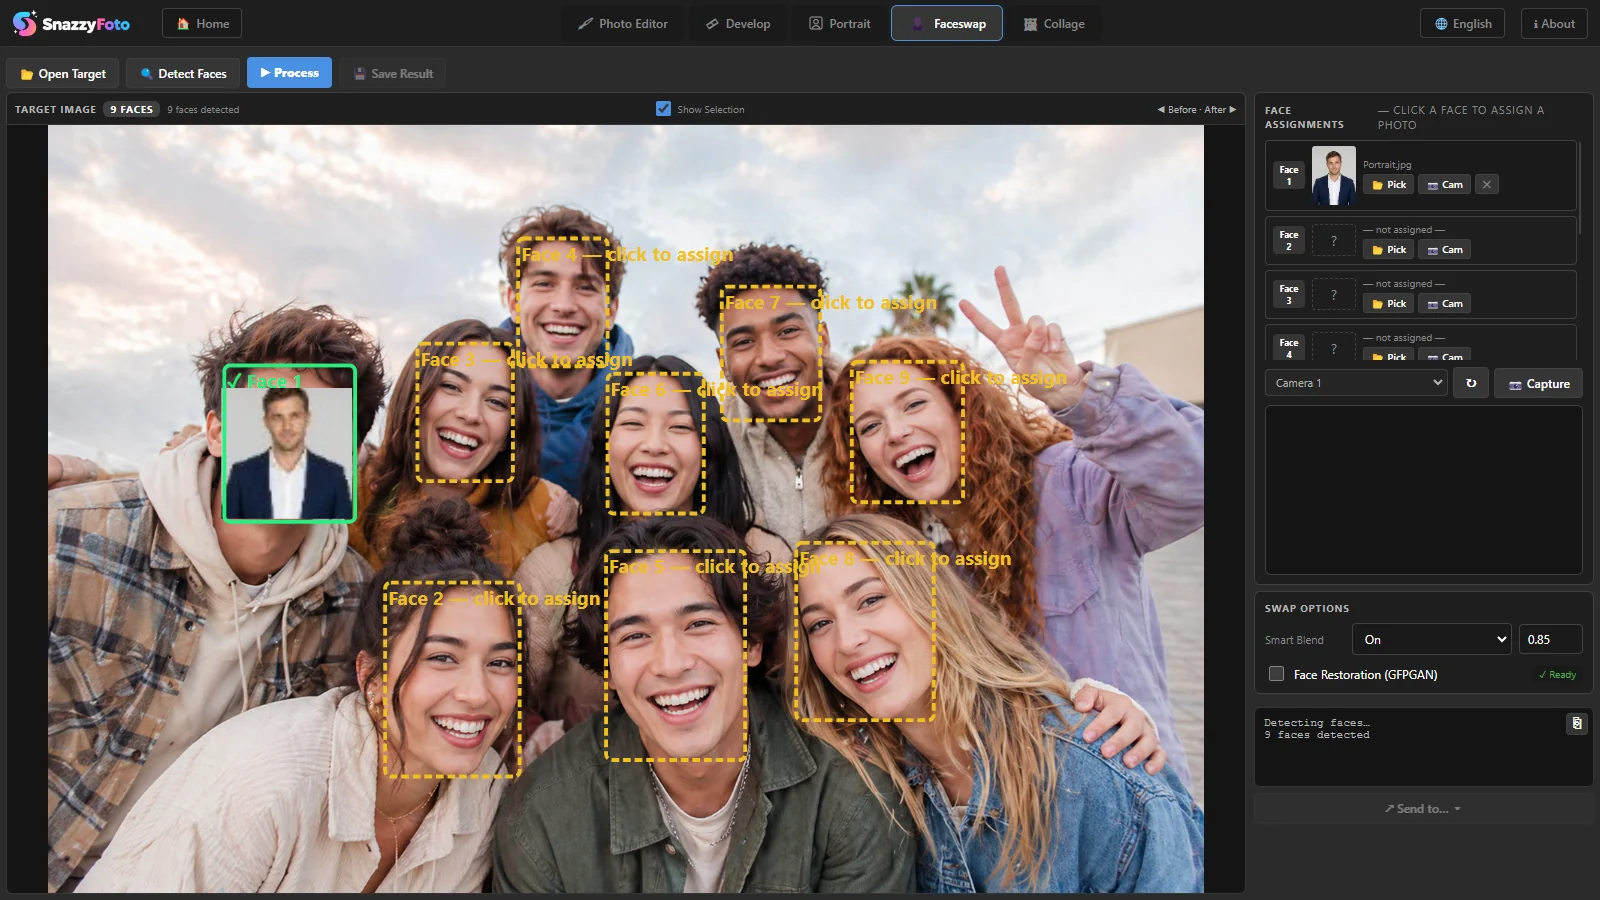
Along the top are the four steps: Open Target, Detect Faces, Process and Save Result. The photo is on the left. On the right you choose a face photo for each person (Face Assignments), set the Swap Options, read what the AI did, and send the result to another module with ↗ Send to… ▾. See Faceswap. Supporter
Collage
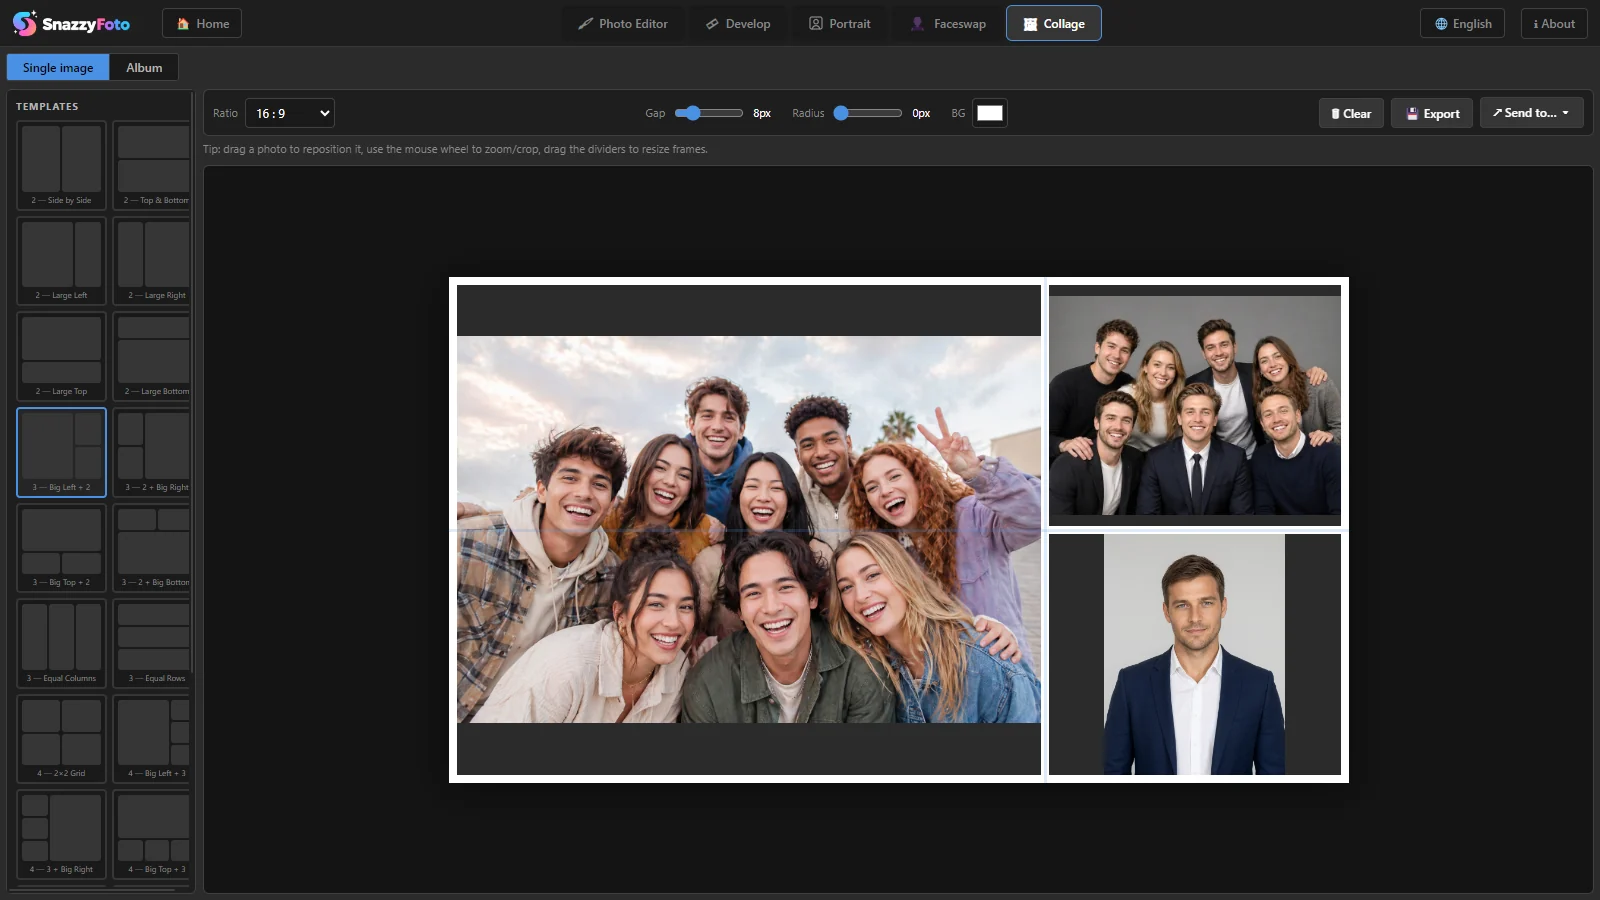
On the left are the Templates. Above the collage are its settings: the shape (Ratio), the gaps, the corners, the background colour, Export and ↗ Send to… ▾. See Collage.
Help, About and settings
The menus belong to the Photo Editor. Most settings for the whole app are in its Help menu:
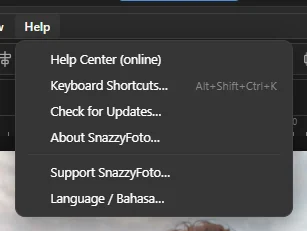 123456
- 1 Help Center (online) — opens this Help Center in your browser.
- 2 Keyboard Shortcuts… — every shortcut of the Photo Editor (Alt + Shift + Ctrl + K).
- 3 Check for Updates… — looks for a new version of SnazzyFoto (see Update to a new version).
- 4 About SnazzyFoto… — the About box (see below).
- 5 Support SnazzyFoto… — your licence: donate, sign in, manage your computers. See Free and Supporter.
- 6 Language / Bahasa… — the same language window as the 🌐 button.
The colour theme is in View › Appearance & custom colours…, and also in Edit › Preferences, next to Reset Workspace, which puts the Photo Editor's panels back where they started.
The About box
Click ℹ About in the top bar (or About on the Home screen).
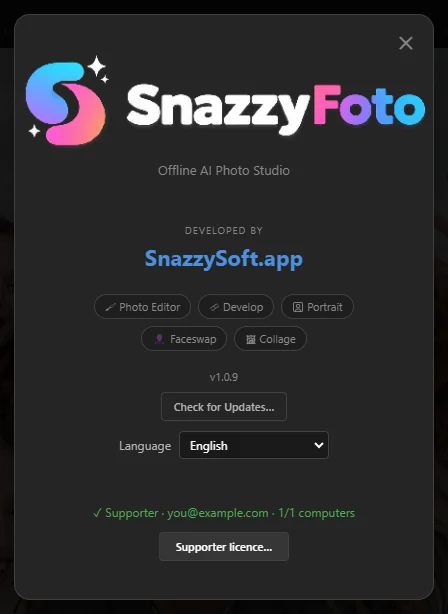 12345
- 1 The version of SnazzyFoto you have.
- 2 Check for Updates… — the same as in the Help menu.
- 3 Language — another place to change the language.
- 4 Your licence: Free version, or Supporter with your email and how many of your computers are in use.
- 5 Support SnazzyFoto… (or Supporter licence…) — opens the licence window.
Closing SnazzyFoto
Close the window as usual. If the Photo Editor has changes you have not saved, SnazzyFoto asks first: Save saves the project, Don't Save closes without saving, Cancel keeps SnazzyFoto open. Develop does not need saving: it remembers your settings for each photo by itself.