
Photo Merge: HDR and panoramas
Merge bracketed exposures into HDR, and stitch panoramas in four steps: Import, Stitch (projections, turning), Crop (with quick or AI fill) and Export. Panoramas are free; HDR is a Supporter feature.
Photo Merge combines several photos into one. HDR merges darker and brighter shots of the same scene, so both the bright sky and the dark shadows keep their detail. Panorama stitches overlapping shots into one wide picture, in a four-step window: Import, Stitch, Crop and Export. HDR Panorama does both. Panoramas are free; the free version saves them up to 1000 pixels on the long edge. HDR is a Supporter feature.
Start a merge
- Add the photos to the filmstrip (see Open photos in Develop).
- Select them: click the first, then Ctrl-click the others, or Shift-click the last of a row.
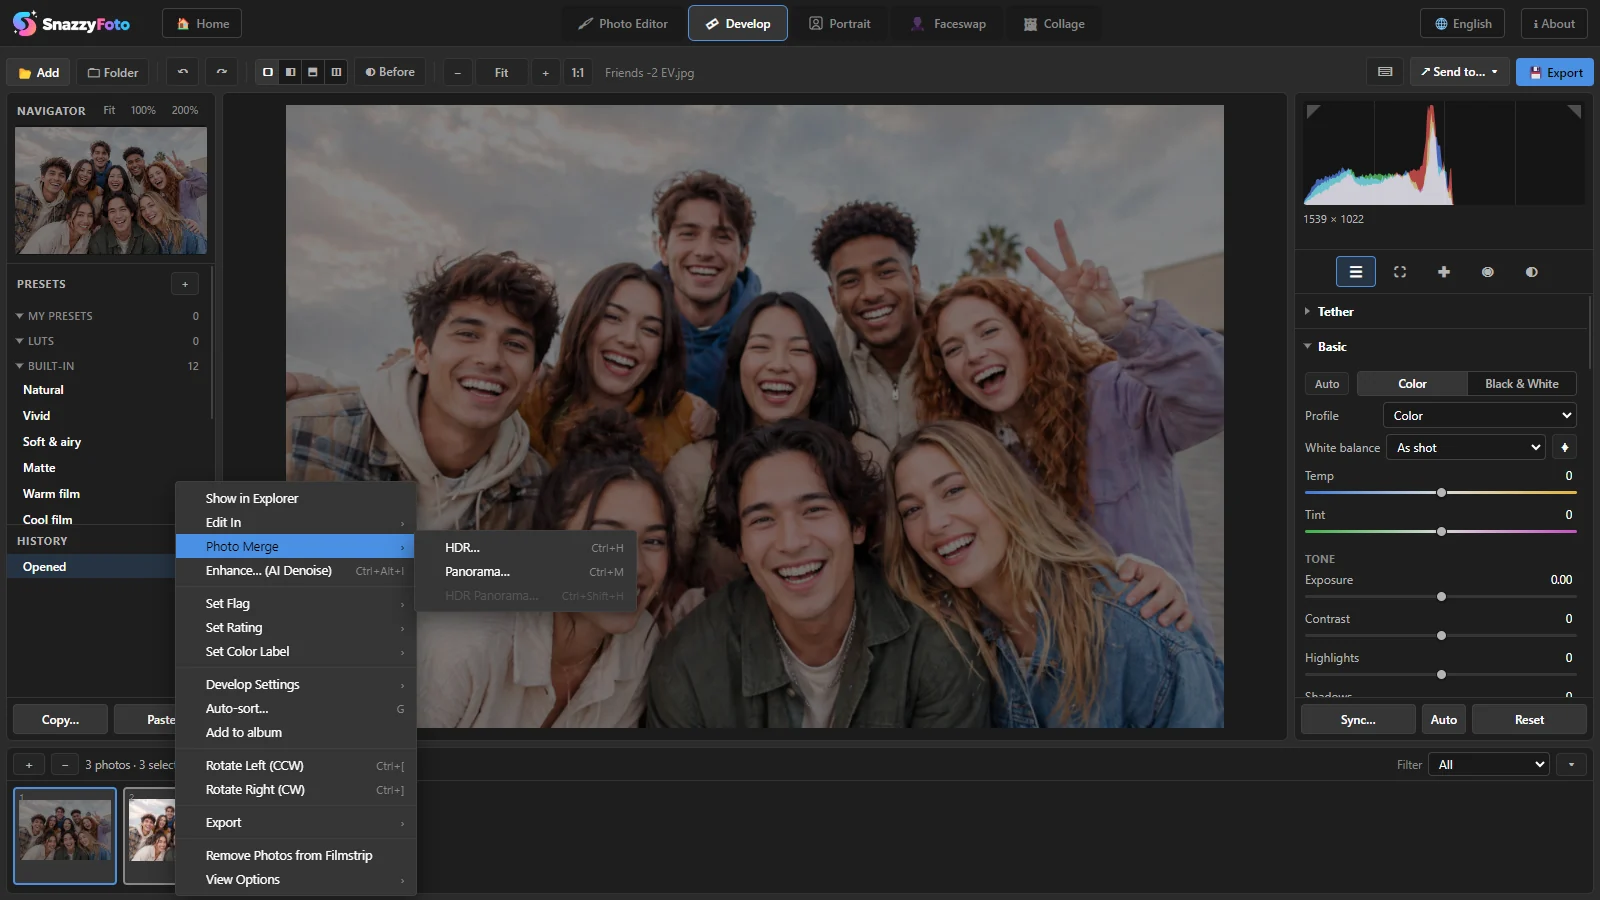
- Right-click one of them and choose Photo Merge, then HDR…, Panorama… or HDR Panorama…. Or press Ctrl + H, Ctrl + M or Ctrl + Shift + H.
 12
HDR opens a small dialog (below). Panorama and HDR Panorama open the panorama window, which stitches the selected photos straight away (see Panorama).
A merge you keep in Develop is a new 16-bit TIFF file, saved next to the first photo. It is added to the filmstrip, ready to edit like any photo. Your original photos are not changed.
| Merge | New file |
|---|---|
| HDR | name-HDR.tif |
| Panorama | name-Pano.tif |
| HDR Panorama | name-HDR-Pano.tif |
Here "name" is the name of the first photo. If that file already exists, a number is added.
HDR… needs at least two selected photos and HDR Panorama… at least four: two or more brackets at each of two or more positions. In the free version, HDR… opens a window about Supporter features instead of the dialog. See Free and Supporter.
HDR Supporter
HDR (high dynamic range) is for scenes with more contrast than one photo can hold, like a room with a bright window. Take the same picture two or more times, darker and brighter (many cameras call this "bracketing" or "AEB"), then merge them.
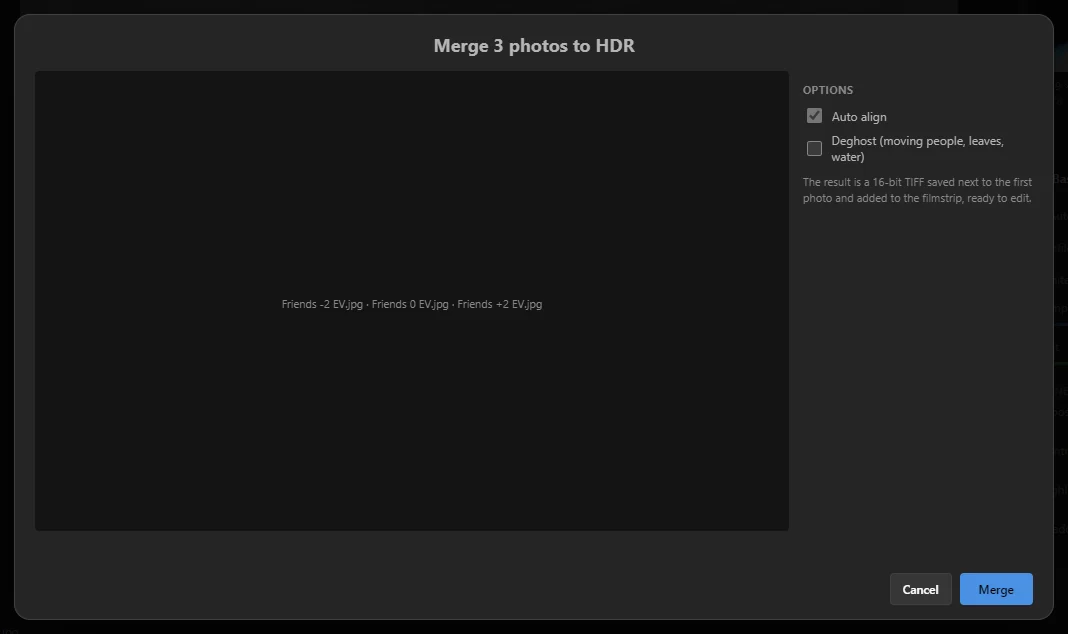 123
- 1 Auto align — always on: small shifts between the shots (from holding the camera by hand) are corrected.
- 2 Deghost (moving people, leaves, water) — tick it when something moved between the shots. In those places one shot is used, so there are no see-through "ghosts".
- 3 Merge — starts merging (Merging … photos…). The dialog closes when the new photo is ready.
The merged photo opens with the look of a RAW file: bright enough, with all the detail of the darkest and brightest shot to work with. Pull Highlights down and Shadows up in the Basic panel to bring it out.
Merge RAW files when you have them: they hold the most detail. JPEG and TIFF brackets work too.
Panorama
Take a series of photos while you turn on the spot, each one overlapping the previous one by about a third to a half (30–50 %). Keep the same exposure for all of them. Then select them and press Ctrl + M.
The panorama window has four steps along the top. Next and Back move between them, and you can click a step you have already reached. Esc or ✕ closes the window without saving anything.
1. Import
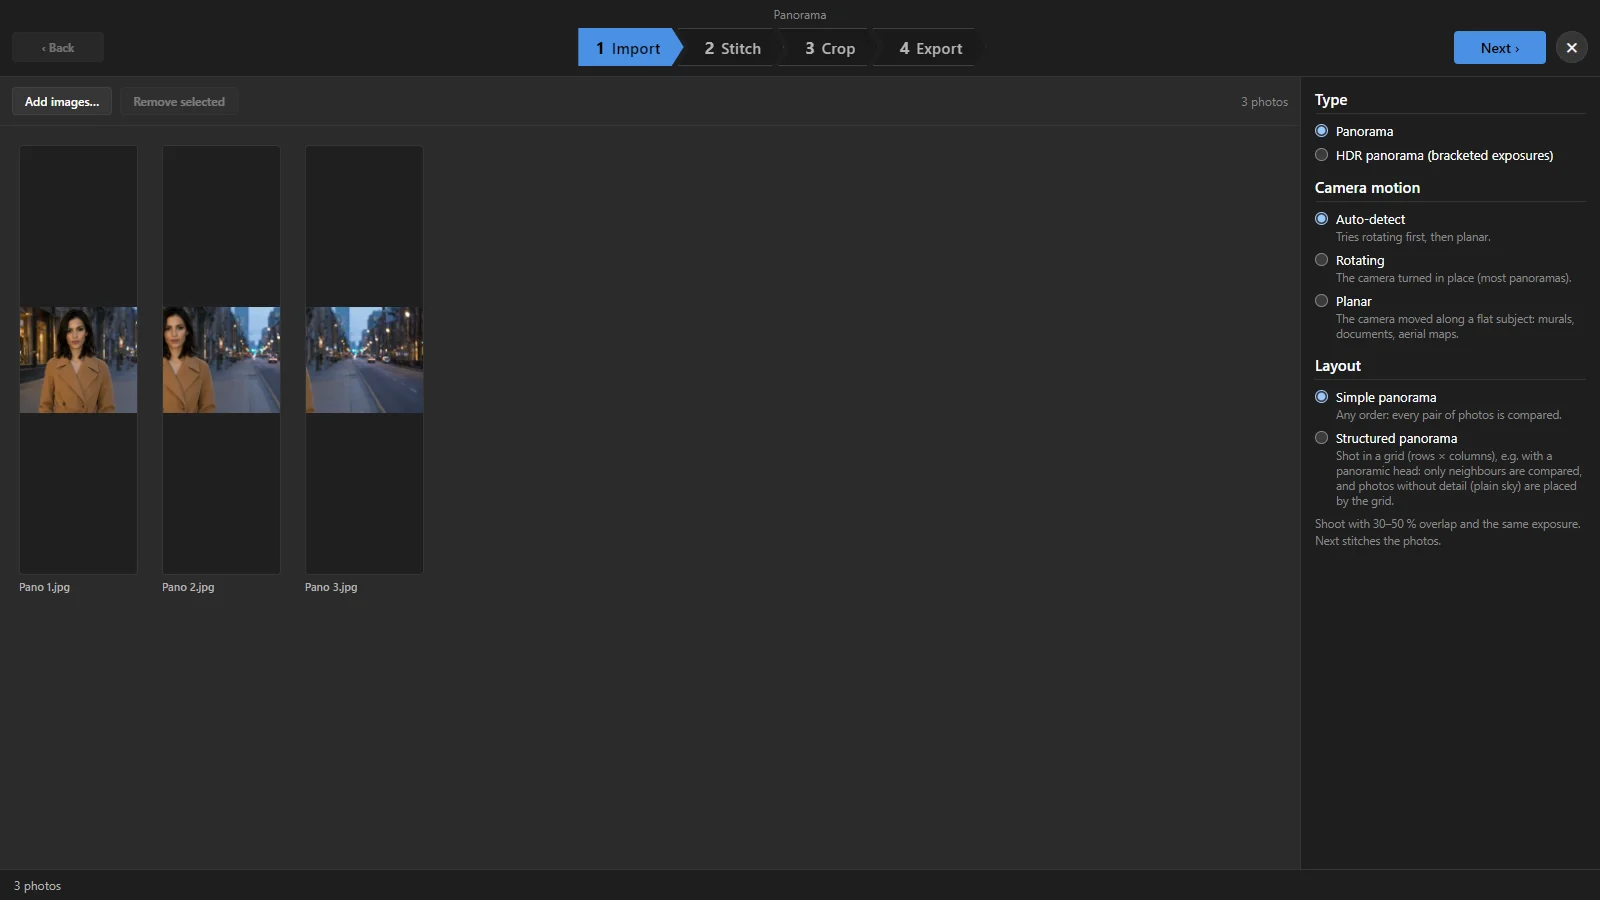 123456
- 1 Steps — where you are.
- 2 Photos — the photos to stitch. Click one to select it, Ctrl-click to select more.
- 3 Add images… adds more photos; Remove selected takes the selected ones out.
- 4 Type — Panorama, or HDR panorama (bracketed exposures) (see HDR Panorama).
- 5 Camera motion — how you moved the camera:
- Auto-detect — tries Rotating first, then Planar. Start here.
- Rotating — you turned on the spot. Most panoramas.
- Planar — you moved the camera along a flat subject: a long mural, a big document in parts, a map from a drone.
- 6 Next — stitches the photos (Stitching…) and goes to step 2.
Structured panorama
Under Layout, Simple panorama works for photos taken in any order. Choose Structured panorama when you shot a grid of rows and columns, for example with a panoramic head. Then only neighbouring photos are compared, which is faster and avoids wrong matches, and a photo with nothing to match (a plain blue sky) is placed by the grid instead of being left out.
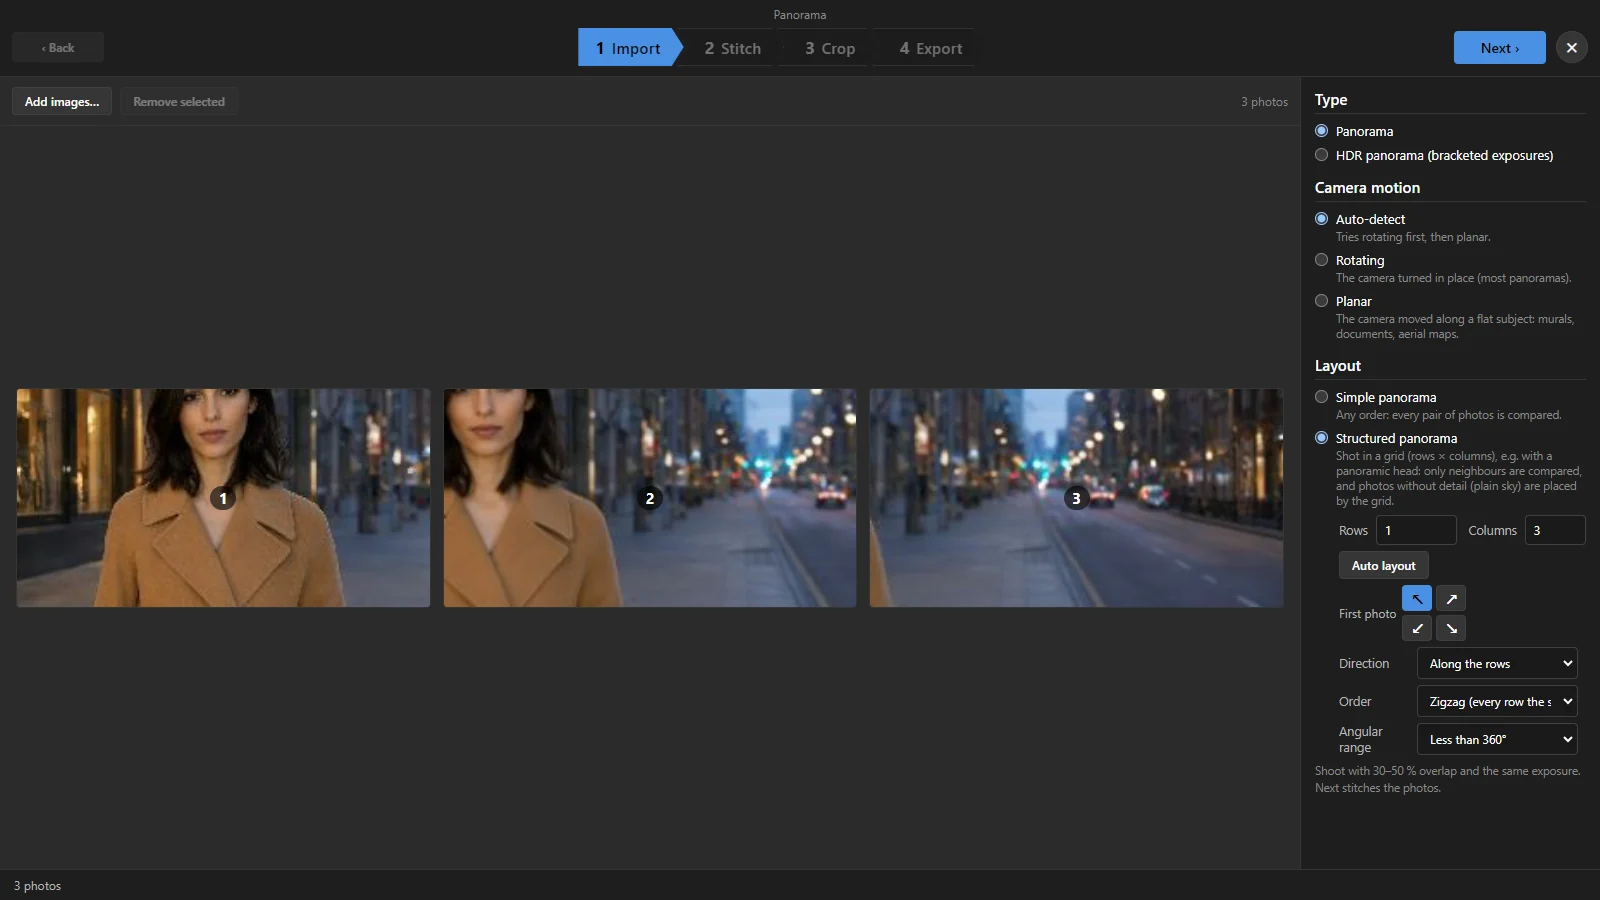 12
- 1 Rows and Columns of the grid (Auto layout puts every photo in one row). First photo is the corner you started in; Direction is Along the rows or Down the columns; Order is Zigzag (every row the same way) or Serpentine (back and forth); Angular range says whether the grid goes all the way round (360° horizontally or 360° vertically).
- 2 The grid — each photo where the layout puts it, numbered in shooting order. Check that the numbers match the way you shot.
Photos placed by the grid are listed in the status line after stitching: Placed by the grid (no matches): followed by the file names.
When you start from the filmstrip, the window skips this step and stitches right away. Come back with Back to change the photos or the options; Next then stitches again.
2. Stitch
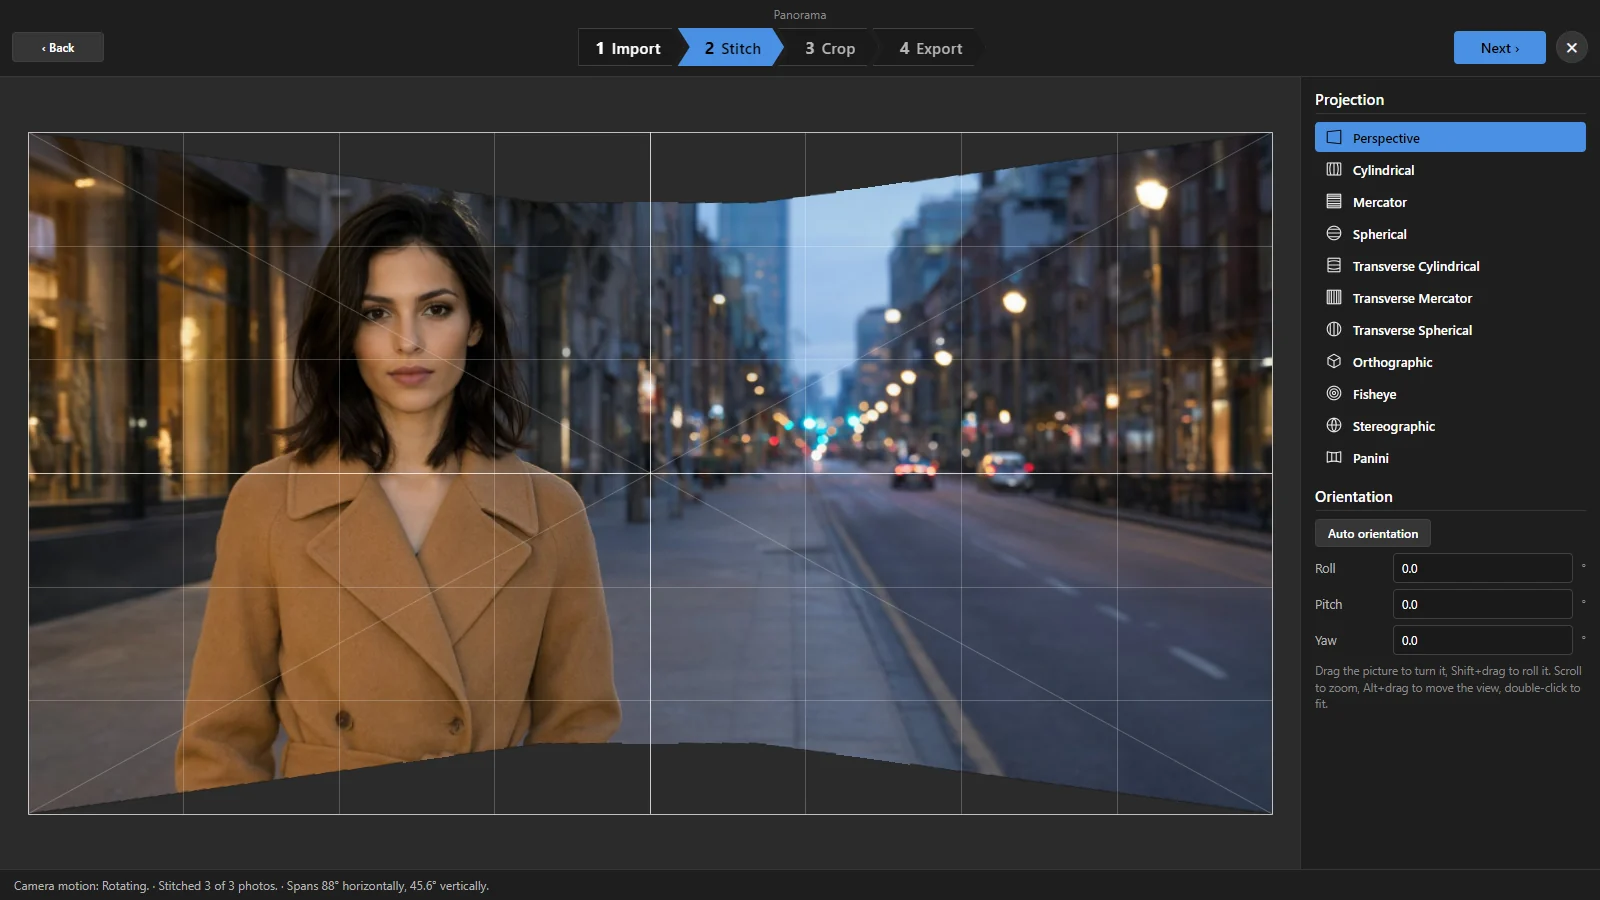 12345
- 1 The panorama — with a frame and a grid to help you keep it straight. Drag the picture to turn it; Shift+drag tilts it (roll). Scroll to zoom, Alt+drag to move the view, double-click to fit it again.
- 2 Projection — how the wide view is laid flat. SnazzyFoto picks one for you; click another to see it at once:
- Perspective — for a narrower view, such as architecture: all straight lines stay straight.
- Cylindrical and Mercator — for a single wide row; vertical lines stay straight.
- Spherical — very wide (up to 360°) or several rows.
- Transverse Cylindrical, Transverse Mercator, Transverse Spherical — the same, for a tall (vertical) panorama.
- Panini — wide interiors and streets: straight vertical lines and less stretching at the sides.
- Orthographic, Fisheye, Stereographic — round views; Little planet (shown with Stereographic) looks straight down at a 360° panorama.
- 3 Orientation — Roll, Pitch and Yaw in degrees, for exact values. Auto orientation levels the horizon and centres the panorama again.
- 4 Status — the camera motion, how many photos were stitched and how wide the panorama is in degrees.
- 5 Next — on to the crop.
3. Crop
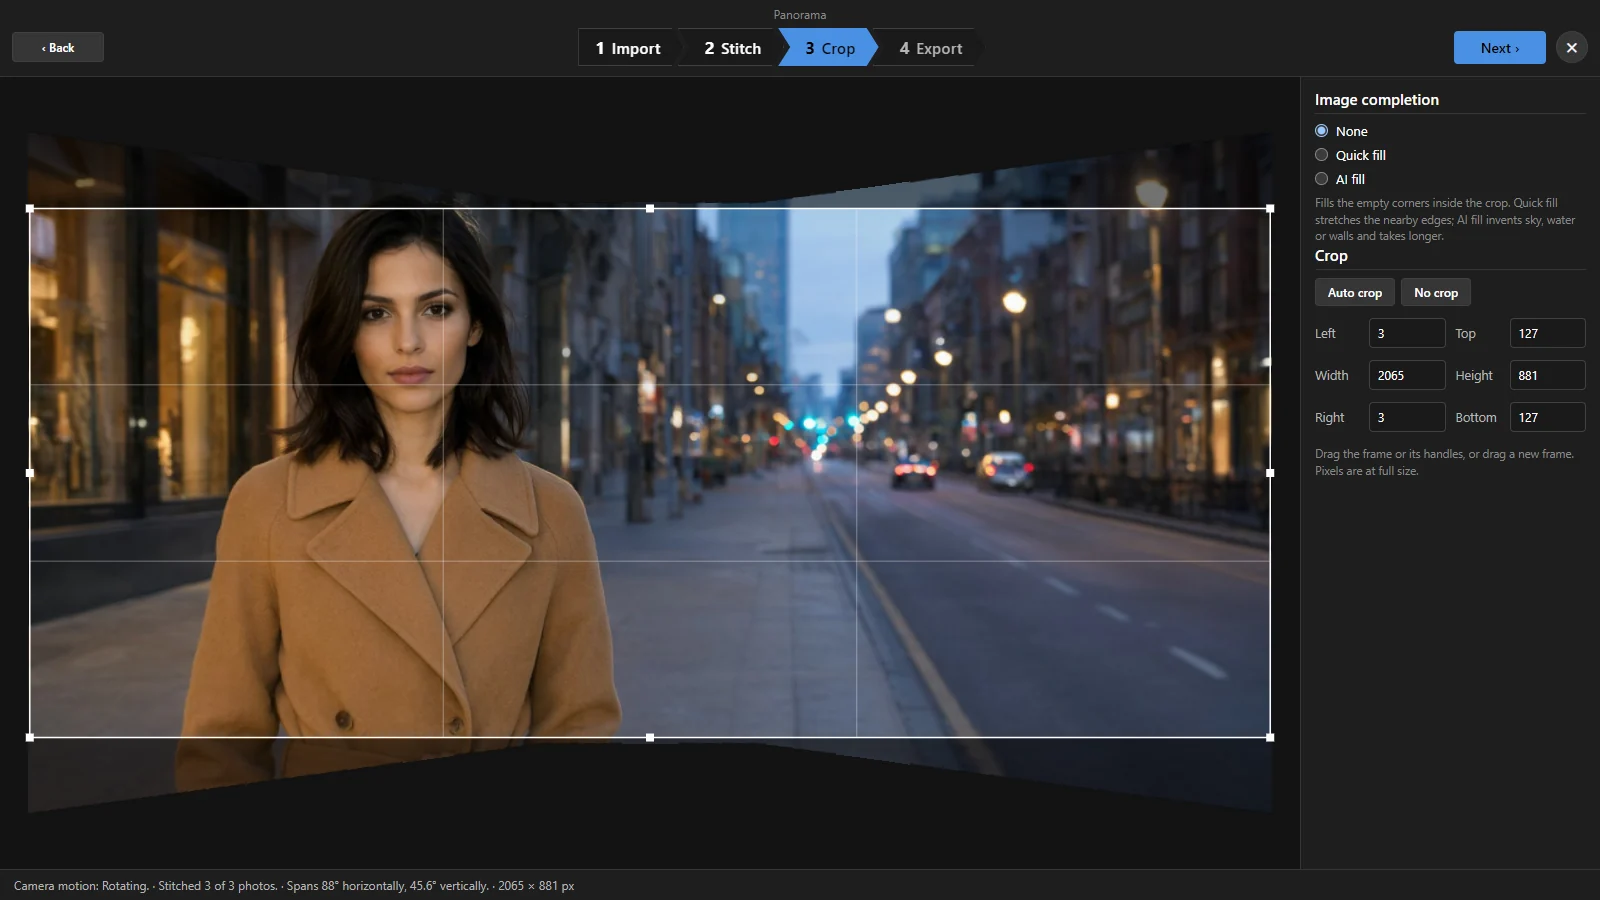 1234
- 1 The crop frame — drag a side or a corner to change it, drag inside it to move it, or drag outside it to draw a new one. It starts as the largest frame without empty corners.
- 2 Image completion — what happens to empty corners inside the frame:
- None — they stay empty (transparent in TIFF and PNG, black in JPEG).
- Quick fill — stretches the nearby edges into them. Fast.
- AI fill — invents sky, water or walls that fit. Slower: about 20 seconds for the preview.
- 3 Auto crop sets the frame back to the largest one without empty corners; No crop keeps the whole panorama.
- 4 Left, Top, Width, Height, Right, Bottom — the frame in pixels at full size. Type a number to set it exactly.
Fill a little sky or wall with AI fill and crop off the rest: small gaps fill best.
4. Export
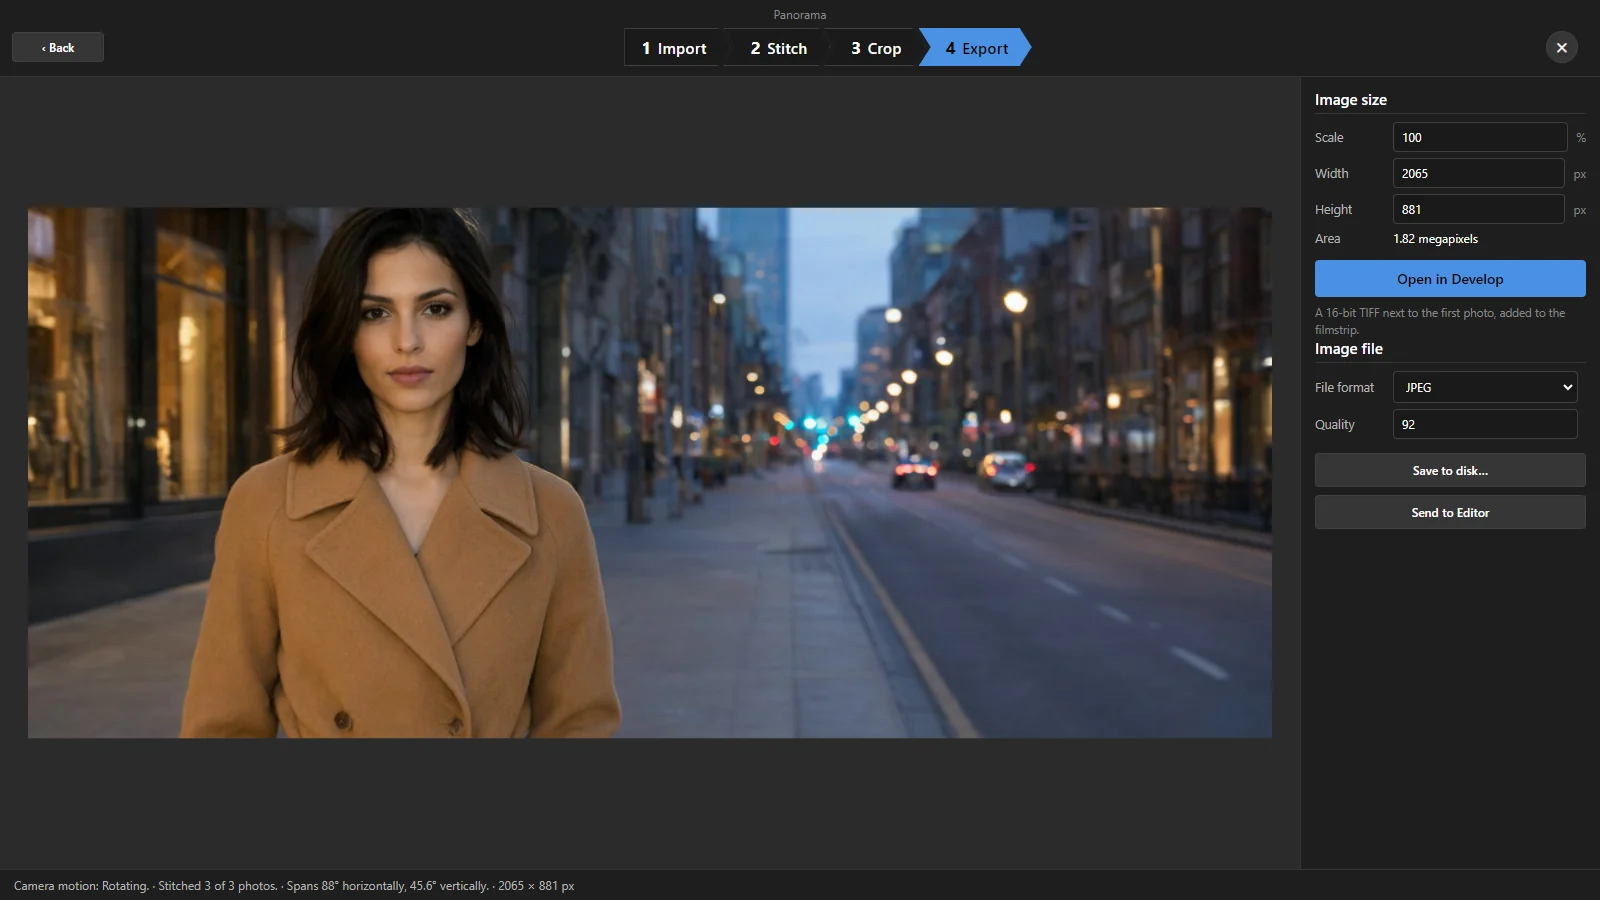 1234
- 1 Image size — Scale in percent, or Width / Height in pixels, and the Area in megapixels.
- 2 Open in Develop — makes the panorama as a 16-bit TIFF next to the first photo and adds it to the filmstrip. The window closes.
- 3 Image file — choose the File format (JPEG, PNG or TIFF (16-bit)) and, for JPEG, the Quality, then Save to disk… and pick a place.
- 4 Send to Editor — opens the panorama in the Photo Editor.
Everyone can stitch panoramas. In the free version the result is at most 1000 pixels on the long edge; Supporters get the full size. See Free and Supporter.
Photos that were left out
SnazzyFoto stitches the largest group of photos that overlap each other. A photo it cannot connect to the others is left out, and the status line says so: Not used (no overlap): followed by the file names.
If too many are left out, shoot again with more overlap, or stitch the ones that do connect. Shot in a grid? A structured panorama places photos that cannot be matched.
HDR Panorama
For a wide view with very bright and very dark parts: at each position, take a bracketed series (for example 3 exposures), then turn and repeat (for example 5 positions = 15 photos).
- Select all the photos of every position.
- Right-click › Photo Merge › HDR Panorama…, or press Ctrl + Shift + H. The panorama window opens with the type HDR panorama (bracketed exposures).
- SnazzyFoto groups the brackets of each position, merges each group to HDR, then stitches them. The status line shows how many positions it found. If it groups them wrongly, go Back and set Brackets per position; tick Remove ghosts when something moved.
- Continue with the steps as for a panorama.
Questions
The photos could not be stitched.
The photos probably don't overlap enough, or they were not taken from the same spot. Check that neighbouring photos share at least a third of the picture, and that the selection holds only the photos of this panorama. For a flat subject you walked along, choose Planar in step 1.
Stitching or exporting takes long.
Merging many large photos is heavy work for the computer; a panorama of many RAW files can take a few minutes. Changing the projection, the turn and the crop is instant, because the photos are matched only once. Close other heavy programs while it runs.
The horizon is curved or the picture leans.
Click Auto orientation, or drag the picture up or down a little in step 2. Cylindrical and Panini keep vertical lines straight.