
Your first edit
A step-by-step beginner tutorial: open a photo, fix light and colour in Develop, crop it, add a line of text in the Photo Editor and export a JPEG.
This tutorial takes one photo from start to finish: you brighten it and fix its colour in Develop, crop it, add a line of text in the Photo Editor and save it as a JPEG to share. It takes about ten minutes, and everything in it is free.
You need one photo, for example a portrait from your phone. Your original file is never changed: SnazzyFoto always saves the result as a new file.
1. Open your photo in Develop
Develop is the place for light and colour. Start there.
- On the Home screen, under Tools, click Develop a photo.
- Pick your photo and click Open.
Develop opens with your photo in the middle. On the right are the panels with sliders; the first one is Basic. Your photo is also in the filmstrip at the bottom.
Already past the Home screen? Click the Develop tab at the top, then Open photos. Or simply drag the photo from File Explorer onto Develop.
2. Fix the light and colour
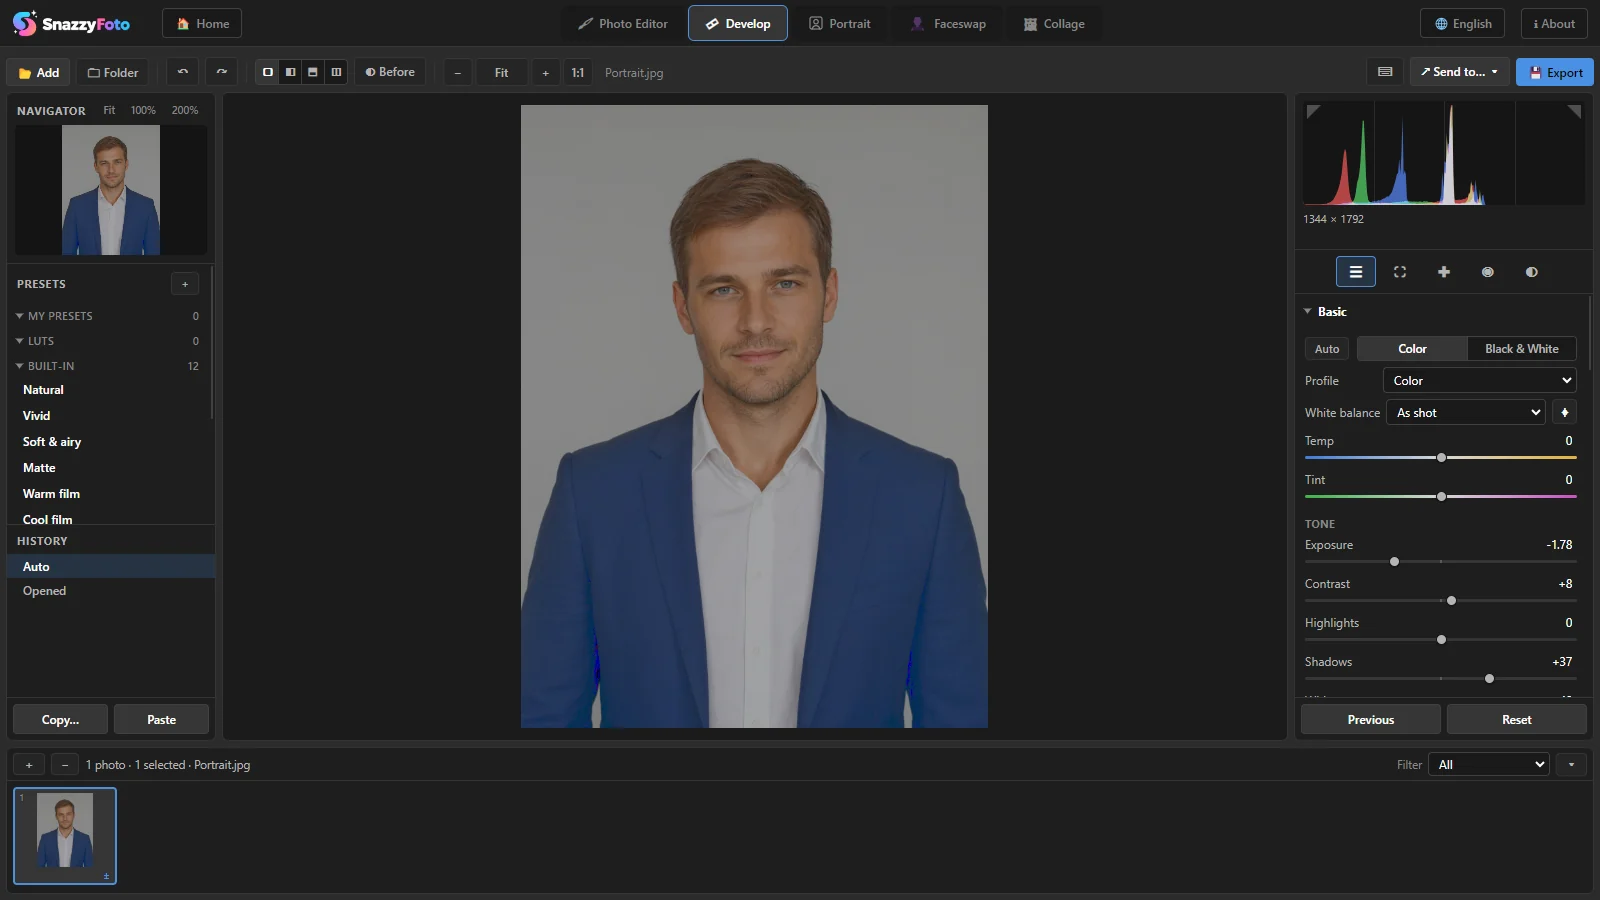 1234
- Click Auto 1 at the top of the Basic panel (or press Ctrl + U). SnazzyFoto sets the tone sliders for you. It is a good start for most photos.
- Fine-tune with the sliders 2. Drag a slider, or click its number and type a value. The ones to try first:
- Exposure — the brightness of the whole photo.
- Highlights — the bright parts. Drag left to bring back a white sky or a shiny forehead.
- Shadows — the dark parts. Drag right to see more in a dark face or background.
- Vibrance — makes dull colours richer, more gently than Saturation.
- To compare with the original, click Before 3 in the toolbar or press \. Press it again to see your edit.
Made a mistake? Press Ctrl + Z to undo, or click an earlier step in the History 4 on the left. Double-click a slider (or its name) to put it back where it started.
Develop remembers your settings for each photo by itself, so there is nothing to save here. Open the same photo in Develop later and your edit is still there.
3. Crop and straighten
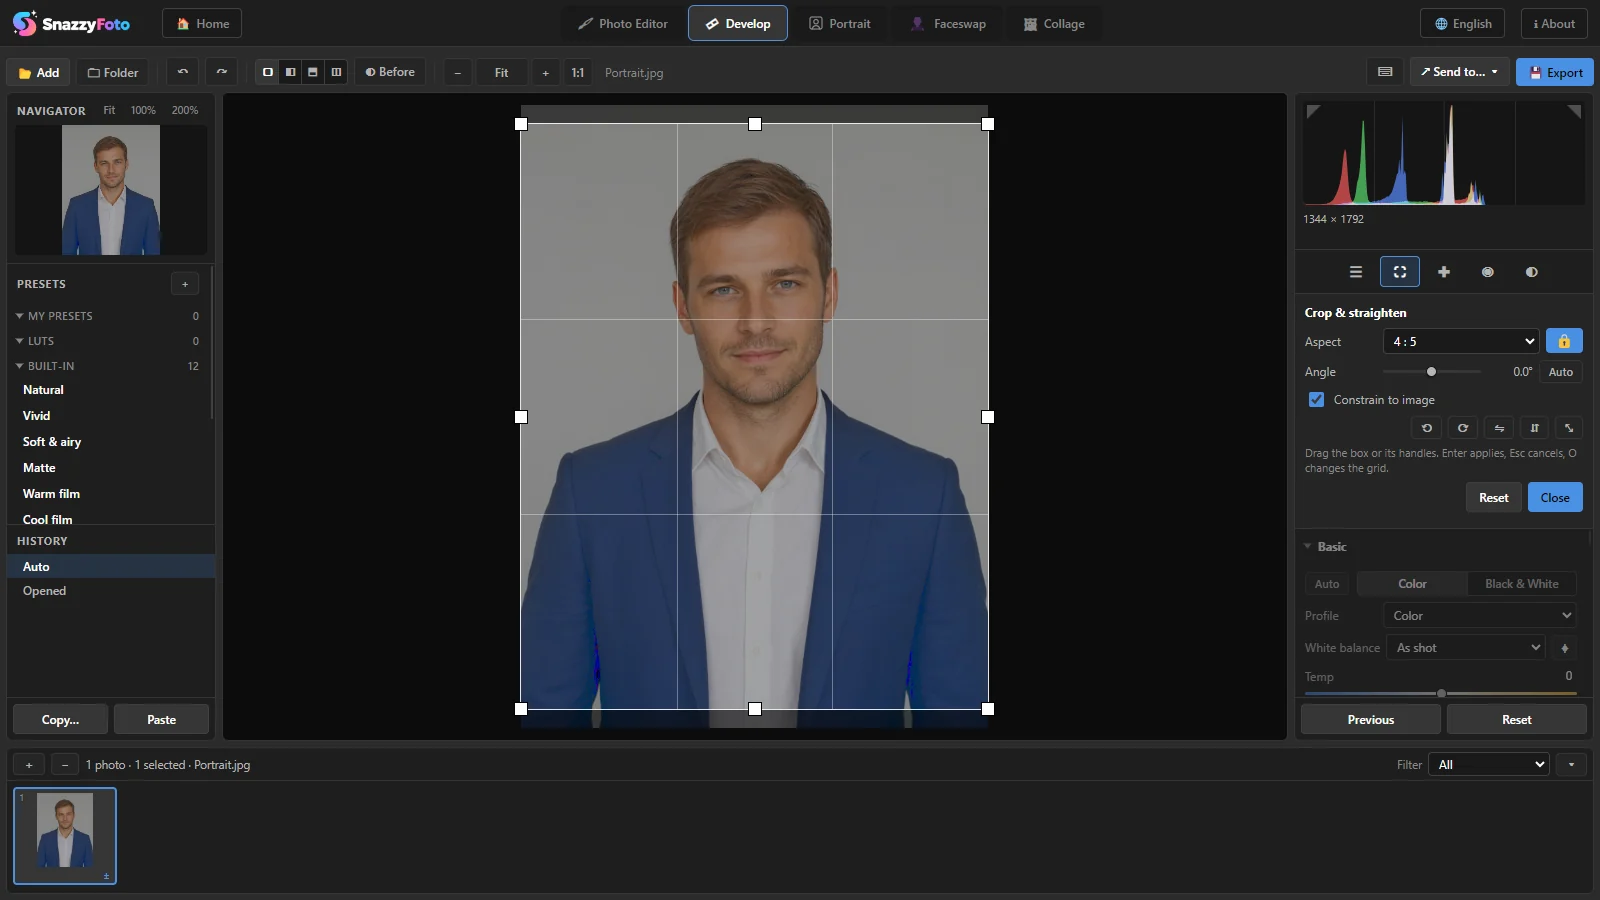 12345
- Click the crop icon 1 in the row of tools on the right, or press R. A box with handles appears on the photo.
- Choose a shape under Aspect 2, for example 4 : 5 for an Instagram portrait or 1 : 1 for a square. Original keeps the photo's own shape; Free lets you drag any shape.
- If the horizon is tilted, drag the Angle slider 3, or click the Auto next to it to straighten from the lines in the photo.
- Drag the box 4 to move it, and its corners to make it smaller or bigger.
- Press Enter or click Close 5. The photo is shown cropped. (Esc cancels.)
You can open the crop tool again at any time and change it: nothing is cut off for good until you export.
4. Send the photo to the Photo Editor
Text is added in the Photo Editor. Press Ctrl + E, or click ↗ Send to… ▾ at the top right of Develop and choose Photo Editor.
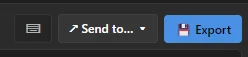 12
- 1 ↗ Send to… ▾ — sends the developed photo, at full size, to the Photo Editor or another module.
- 2 Export — saves the photo as a file straight from Develop. Use this instead when you don't want to add anything (see Export from Develop).
SnazzyFoto switches to the Photo Editor, with your photo as a new picture.
If the Photo Editor already had a picture open, your photo is added to it as a new layer called From Develop instead. To get a picture of its own, close the other one first with File › Close (Ctrl + W), then send again.
5. Add a line of text
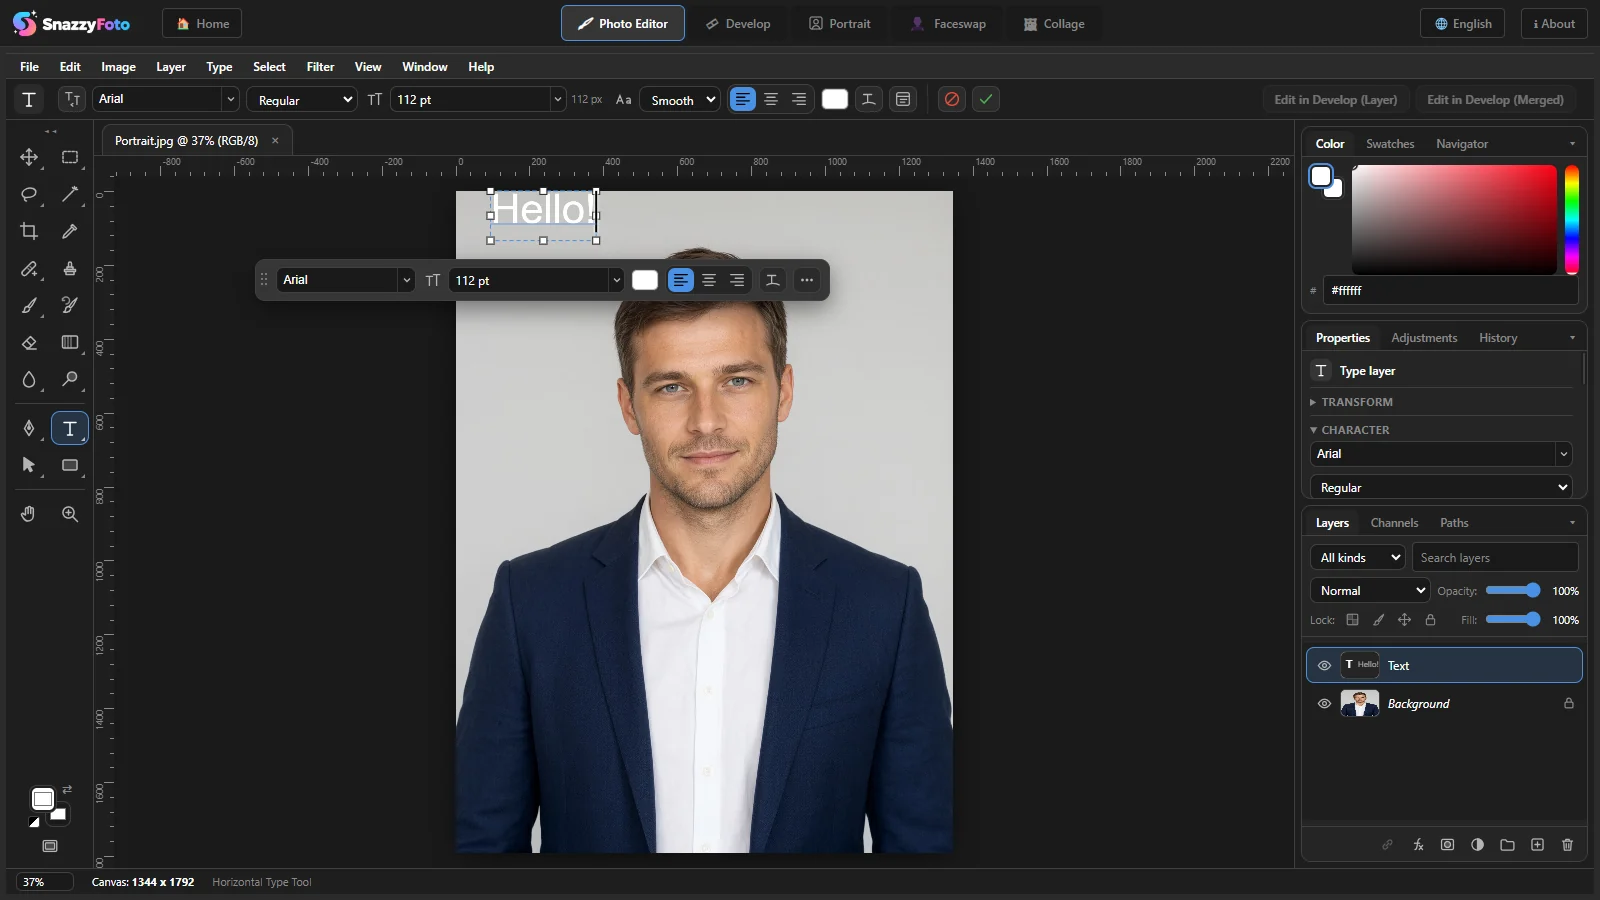 1234
- Click the T in the toolbox 1 (the Horizontal Type Tool), or press T.
- Click on the photo where the text should start, and type straight on the picture. Enter starts a new line.
- Change the font, the size and the colour in the options bar 2 (or in the small bar that follows the text). Select letters first to change only those.
- Click ✓ 3 in the options bar (or press Ctrl + Enter, or click outside the text). The text becomes its own layer 4 in the Layers panel, above the photo. Esc would cancel what you typed.
- To move the text, press V for the Move tool and drag it.
The text stays editable: click it again with the Type tool, or select its layer and choose Type › Edit Text, to change the words. More in Text and shapes.
6. Export a JPEG
- Choose File › Export › Export As… (Alt + Shift + Ctrl + ').
- The Save file window opens. Choose a folder and type a name.
- Under Save as type, choose JPEG, the best format for sharing photos. Click Save.
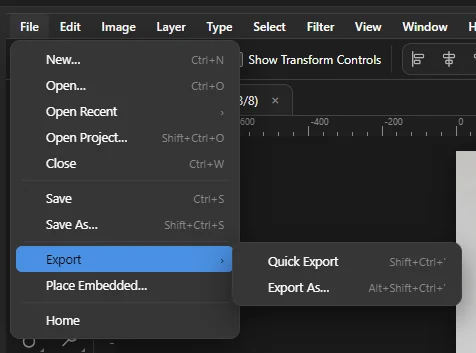 12
The picture is saved as a JPEG, ready to share or print. It is a new file: your original photo is untouched.
Export As… also saves PNG (keeps transparent areas, larger files) and WebP (small files for websites). Quick Export (Shift + Ctrl + ') saves a PNG straight away. In a JPEG, transparent areas become white. More about saving and exporting in Photo Editor basics.
In the free version, a picture larger than 2048 pixels on its long side is saved at 2048 pixels (keeping its shape). That is plenty for social media. A Supporter donation saves the full size — see How the 2048 px limit works.
7. Keep it editable (optional)
A JPEG is flat: the text is part of the picture. To change the text later, also save a project: File › Save (Ctrl + S). SnazzyFoto saves a .snazzy file with all the layers, at full size. Open it again from Recent on the Home screen, or with File › Open Project….
That's it
You developed a photo, cropped it, added text and exported it. From here: