
Lens Blur and depth haze
Blur the background (or foreground) of a photo like a fast lens with Develop's Lens Blur: the AI measures the depth, you pick the focus point and the in-focus range; add depth haze that grows with the distance. A Supporter feature.
Lens Blur makes the background (or the foreground) of a photo softly out of focus, as if it was taken with an expensive, bright lens. Depth haze adds mist that grows with the distance. The AI works out how far away every part of the photo is. Supporter
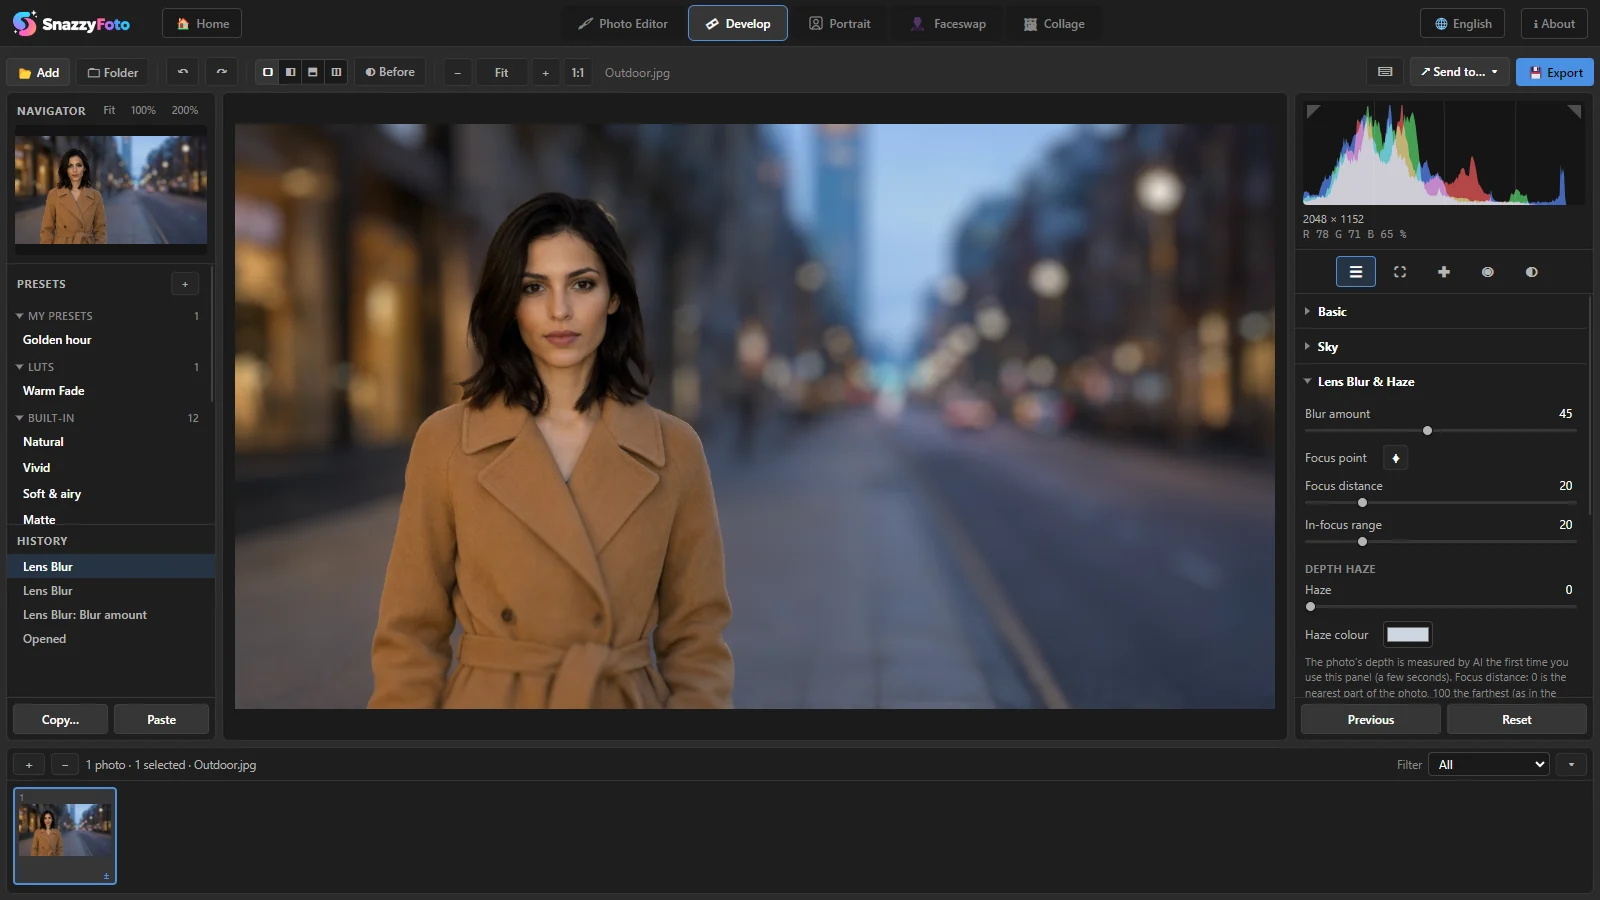 12345
- 1 Blur amount — how blurry the parts out of focus get. 0 is off.
- 2 Focus point ⌖ — click it, then click the photo where it should be sharp.
- 3 Focus distance and In-focus range — which distance is sharp, and how deep the sharp zone is.
- 4 Haze and Haze colour — mist that is thicker further away.
- 5 The photo: she stays sharp, the street, the lights and the cars behind her are soft.
Blur the background
- Open the photo in Develop and open the Lens Blur & Haze panel (under Sky).
- Move Blur amount to the right. The first time, Measuring depth… appears for a few seconds while the AI works out the depth of the photo.
- Click ⌖ next to Focus point, then click the face or object that should stay sharp. Focus distance moves to its distance.
- Raise In-focus range to keep more of the photo sharp (for example a whole group of people), lower it for a thin, dreamy sharp zone.
- Compare with ◐ Before (\), then export as usual.
Focus distance goes from 0 (the nearest part of the photo) to 100 (the farthest) — the same scale as the Depth range mask. The blur grows the further a part is from that distance, in front of it as well as behind it. Something sharp in front never smears over what is behind it, and bright lights turn into soft discs, as with a real lens.
Depth haze
Under Depth haze, raise Haze to add mist that gets thicker with the distance from the camera: nearby things stay clear, far hills and buildings fade. Haze colour sets the colour of the mist — light grey-blue for morning mist, warm for a dusty sunset. Haze works with or without the blur.
Tips
- Photos with a clear foreground and background give the best result: a person in front of a street, flowers in front of a garden.
- Keep the blur modest for photos you print large. Look at 100 % (1:1) around hair and edges.
- The depth is measured once per photo and remembered. Turning or flipping the photo measures it again.
- To give other photos the same blur, tick Lens Blur & Haze in Copy… or Sync…; each photo then measures its own depth. See Edit many photos at once.
- The same depth is used by the Depth range mask, to change only what is near or far.
- The panel is hidden for 360° photos.
In the free version
Lens Blur and depth haze are a Supporter feature: moving a slider or clicking ⌖ opens the Supporter feature window. See Free and Supporter.
Questions
The wrong part is sharp.
Use ⌖ again and click exactly on the part that should be sharp, or move Focus distance by hand: lower is nearer, higher is farther.
The edges around hair or a person look odd.
The AI's depth is not perfect at fine edges. Lower Blur amount or raise In-focus range. For a portrait, the Portrait module's Blur background cuts the person out more precisely.
Export takes longer with Lens Blur.
Yes: the blur is worked out at full size for the export, and big photos take a few seconds more.