
Masks
Edit only part of a photo with linear, radial and brush masks, or let the AI select the subject, the sky or a depth range; invert, amount and per-mask adjustments.
A mask limits an adjustment to part of the photo: darken only the sky, brighten only a face, warm up only the background. Draw a gradient, an oval or brush strokes yourself, or let the AI find the subject, the sky, or everything within a range of distances for you.
Open Masking
Click ◐ in the tool strip under the histogram, or press Shift + W. The Masking panel replaces the normal panels.
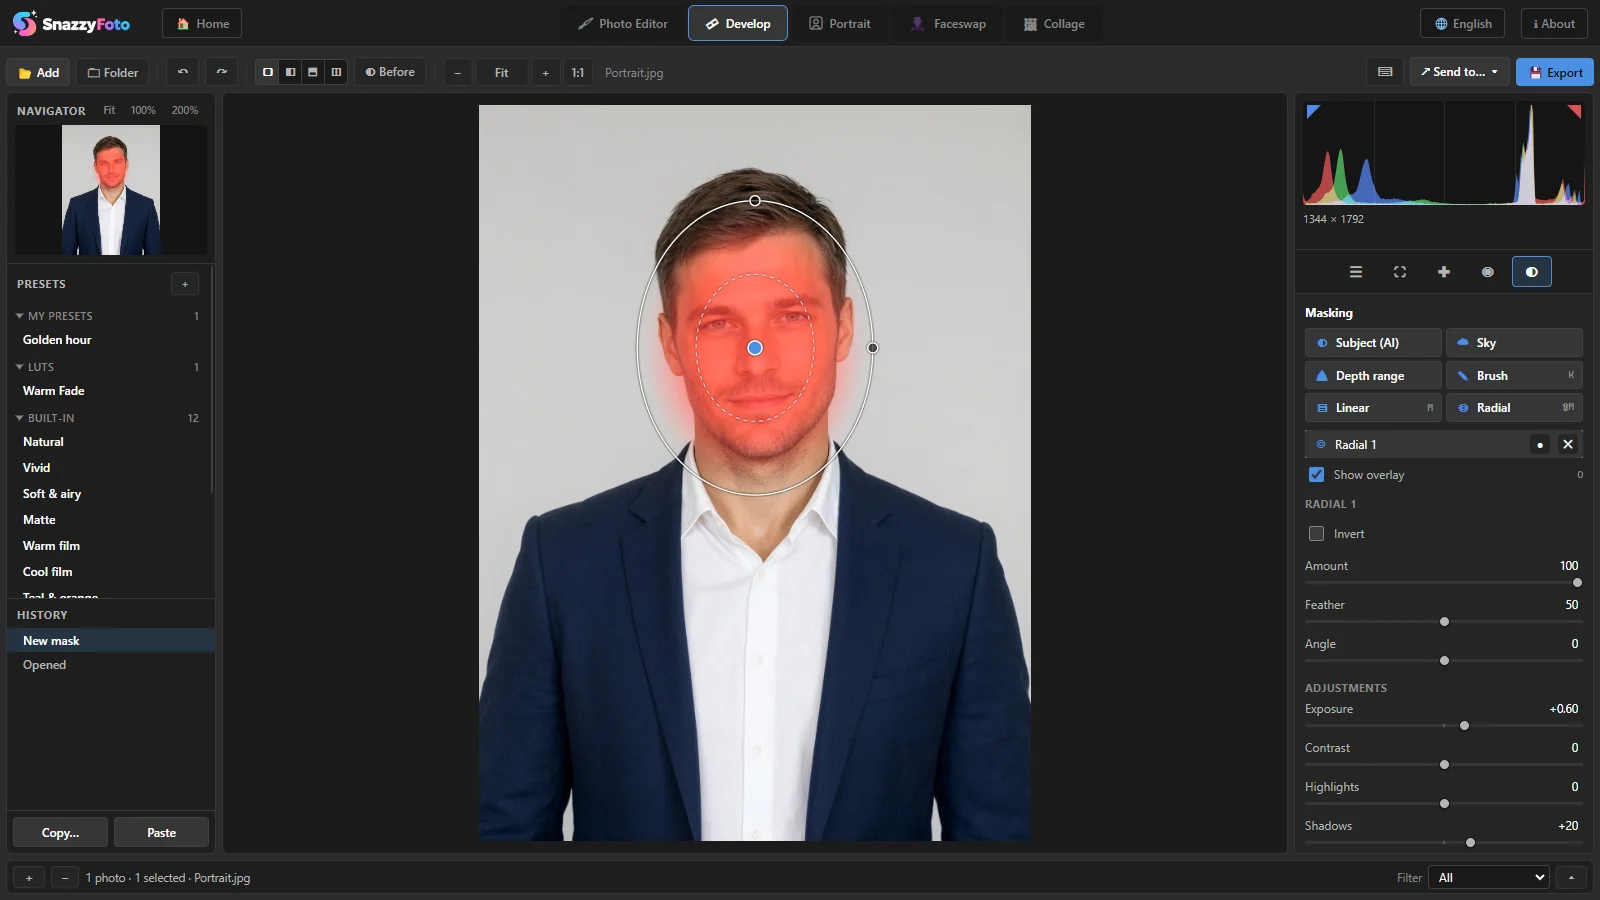 123456
- 1 Create — the six kinds of mask (see below).
- 2 Your masks — click one to select it. ● switches it off and on, ✕ deletes it.
- 3 Show overlay (O) — colours the area the selected mask covers, so you can see exactly where it applies.
- 4 Handles on the photo — drag them to move and reshape the mask.
- 5 Settings of the selected mask: Invert, Amount, and for a radial mask Feather and Angle.
- 6 Adjustments — the mask's own sliders. Scroll down for more.
Click Close at the bottom, or press Esc, to go back to the normal panels. Your masks stay on the photo.
The kinds of mask
| Mask | Covers | Good for |
|---|---|---|
| Subject (AI) Supporter | The main subject, found by the AI. | Making a person stand out from the background. |
| Sky Supporter | The sky, found by the AI. | A deeper, bluer, more dramatic sky. |
| Depth range Supporter | Everything between a near and a far distance, measured by the AI. | A brighter foreground, a darker or hazier background. |
| Brush (K) | Where you paint. | Any shape: a face, a building, one object. |
| Linear (M) | A soft gradient, from full to nothing. | Skies, foregrounds, a darker edge of the frame. |
| Radial (Shift + M) | An oval with a soft edge. | Light on a face, a spotlight effect. |
A photo can have up to 8 masks. The keys M, Shift + M and K work anywhere in Develop: Masking opens and the new mask is ready to draw.
Linear mask (gradient)
- Click Linear or press M.
- Drag on the photo. Where you start, the effect is full; where you let go, it has faded out completely. For a sky, drag from the top down to the horizon.
- Move the sliders under Adjustments, for example Exposure down to darken the sky.
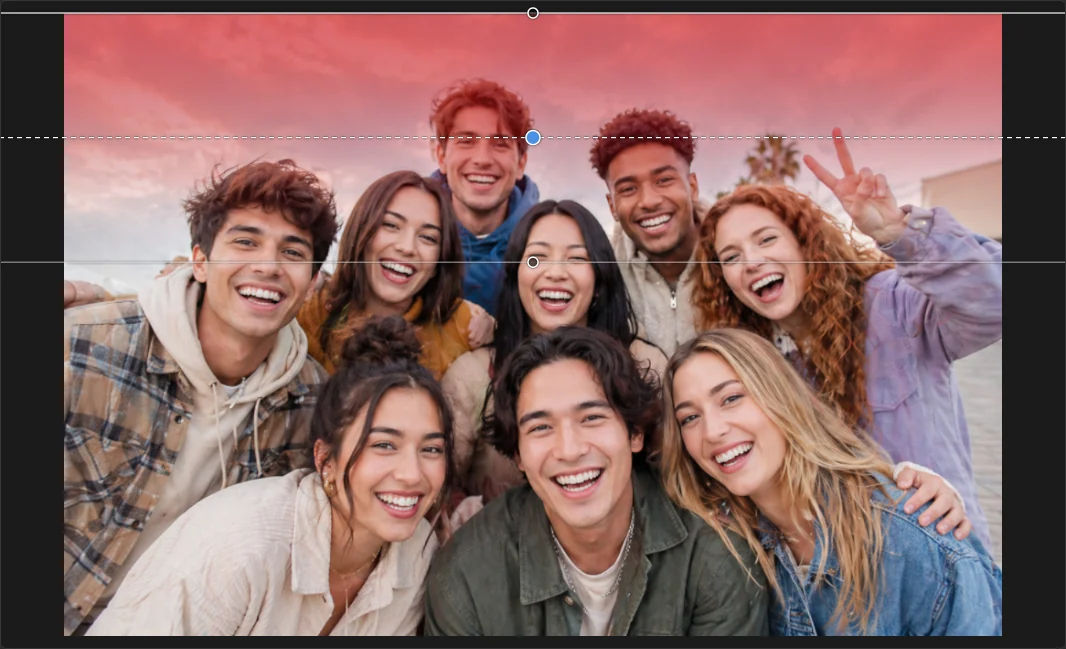 1
1 Three lines show the gradient: full effect, halfway, and none. Drag the end handles to change the angle and length, or the middle handle to move the whole gradient.
Radial mask (oval)
- Click Radial or press Shift + M.
- Drag on the photo from the centre outwards. Hold Shift to make a circle.
- Drag the handles on the edge to change the width and height, and the centre handle to move it.
- Feather sets how soft the edge is (the inner oval shows where the soft part starts). Angle turns the oval.
The effect is inside the oval. Tick Invert to have it outside instead: a classic way to darken everything around a person.
Brush mask
- Click Brush or press K.
- Set the brush under Brush: Size, Feather (how soft the edge of the brush is) and Flow (how much each stroke adds; low values build up gradually).
- Paint over the area you want to change. A circle shows the brush size.
- Painted too much? Hold Alt while you paint, or tick Erase, to take it away again.
Turn on Show overlay (O) while you paint, so you can see the edges of your mask. Turn it off to judge the result.
Subject and Sky Supporter
Click Subject (AI) and SnazzyFoto finds the main subject of the photo (Finding the subject…). The AI runs on your computer; nothing is uploaded. Click Sky and the AI finds the sky (Finding the sky…). If there is none, it says No sky found in this photo.
These masks have no handles. Use Invert to change everything except the subject or the sky.
In the free version, clicking any of the AI masks opens a window that explains the Supporter features. See Free and Supporter.
To put a completely new sky in, use Sky Replacement instead of a Sky mask.
Depth range Supporter
A Depth range mask covers what lies between two distances from the camera. The AI works out the depth of the photo first (Measuring depth…, a few seconds).
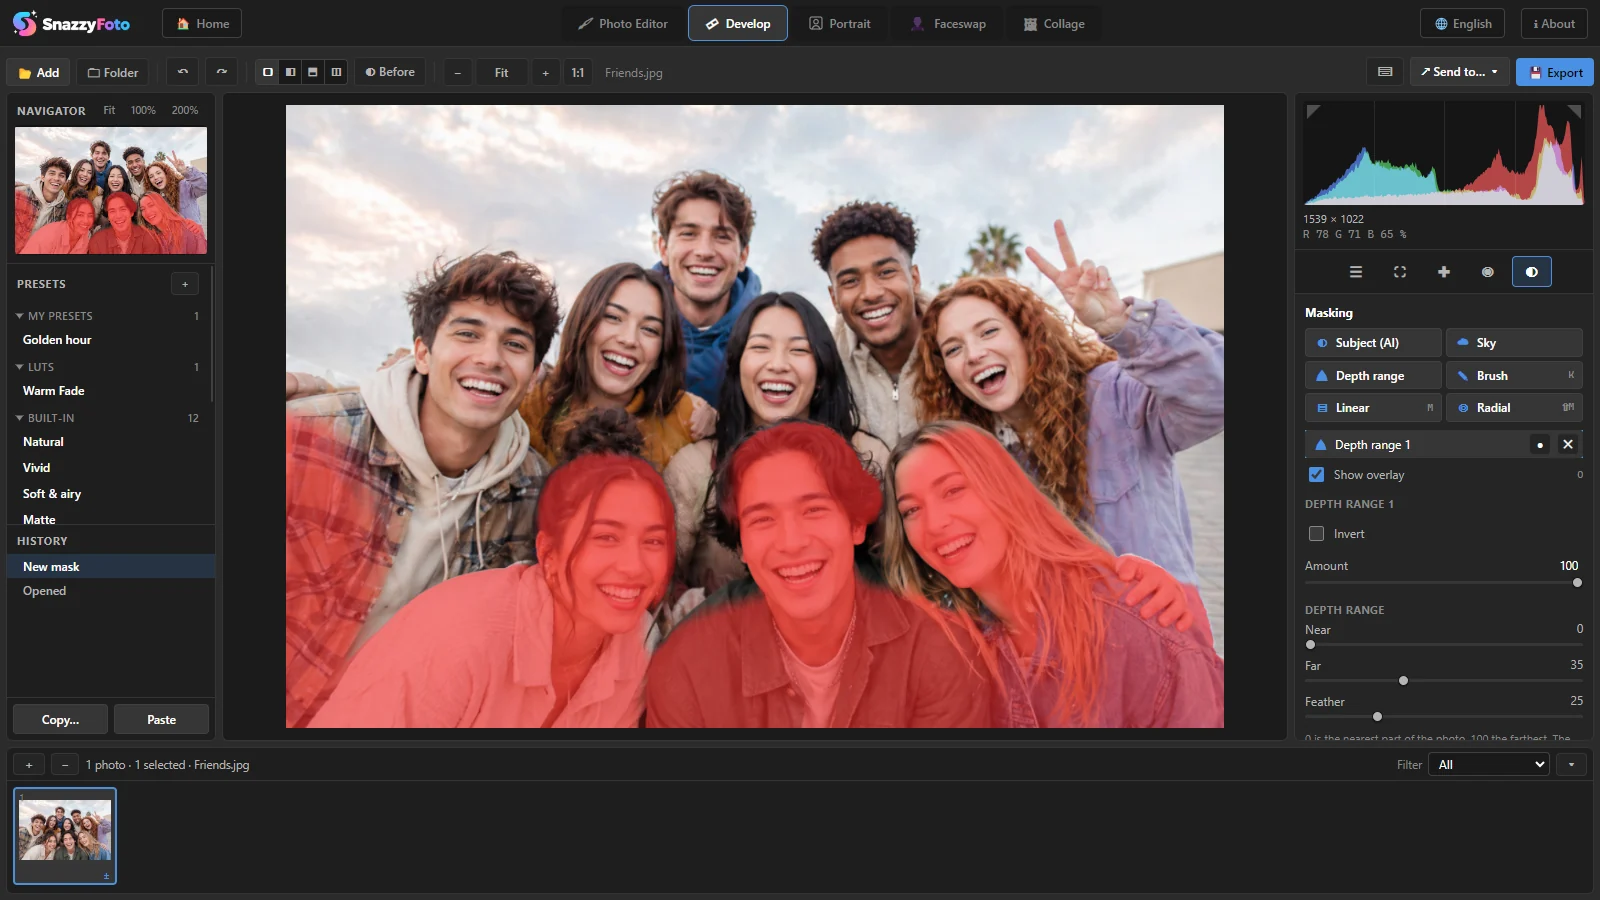 1234
- 1 Depth range — creates the mask.
- 2 The new mask in your list.
- 3 Show overlay — the red colour shows what the mask covers.
- 4 Near, Far and Feather — 0 is the nearest part of the photo, 100 the farthest. The mask covers what lies between Near and Far; Feather makes its edges softer.
A new Depth range mask starts with the nearest third of the photo (0 to 35). Move Near up and Far to 100 to cover the background instead. The overlay follows the sliders while you drag. Then use the mask's Adjustments, for example Exposure up on the foreground, or Dehaze down on the far hills.
For a blurred background, use Lens Blur, which uses the same depth.
A mask's settings and adjustments
Select a mask in the list to see its settings:
- Invert — swaps the inside and the outside.
- Amount — how strong all of this mask's adjustments are, from 0 to 100.
- Adjustments — Exposure, Contrast, Highlights, Shadows, Whites, Blacks, Temp, Tint, Saturation, Texture, Clarity and Dehaze. They work like the ones in the Basic panel, but only inside the mask, on top of your other settings.
- Reset sliders — puts this mask's adjustments back to zero.
To remove a mask, select it and press Delete, or click its ✕.
Masks are fixed to the photo itself, so cropping or straightening later never moves them off their place.
Questions
Can I copy masks to other photos?
Yes. In the Copy settings or Synchronize dialog, tick Masks; it is not ticked by default, because masks usually fit one photo only. See Edit many photos at once.
It says "Up to 8 masks per photo."
Delete a mask you no longer need, or combine the work of two masks into one brush mask.