
Faceswap
Swap faces in a photo with the offline AI: open a target, detect the faces, choose a photo for each, set Smart Blend and face restoration, then save or send the result. A Supporter feature.
Faceswap puts a face from one photo onto a person in another photo. It also works on group photos, with a different face for each person. The AI runs on your own computer: your photos are never uploaded. Supporter
What you need
- The target — the photo whose faces you want to change, for example a group photo.
- A face photo for each face you want to replace. A clear, sharp photo of one person looking more or less at the camera works best.
- A Supporter licence for the last step. In the free version you can open a target and find its faces; Process asks you to donate first (see In the free version).
Only use faces of people who agree to it, and never use a swapped photo to fool or hurt someone.
Swap faces, step by step
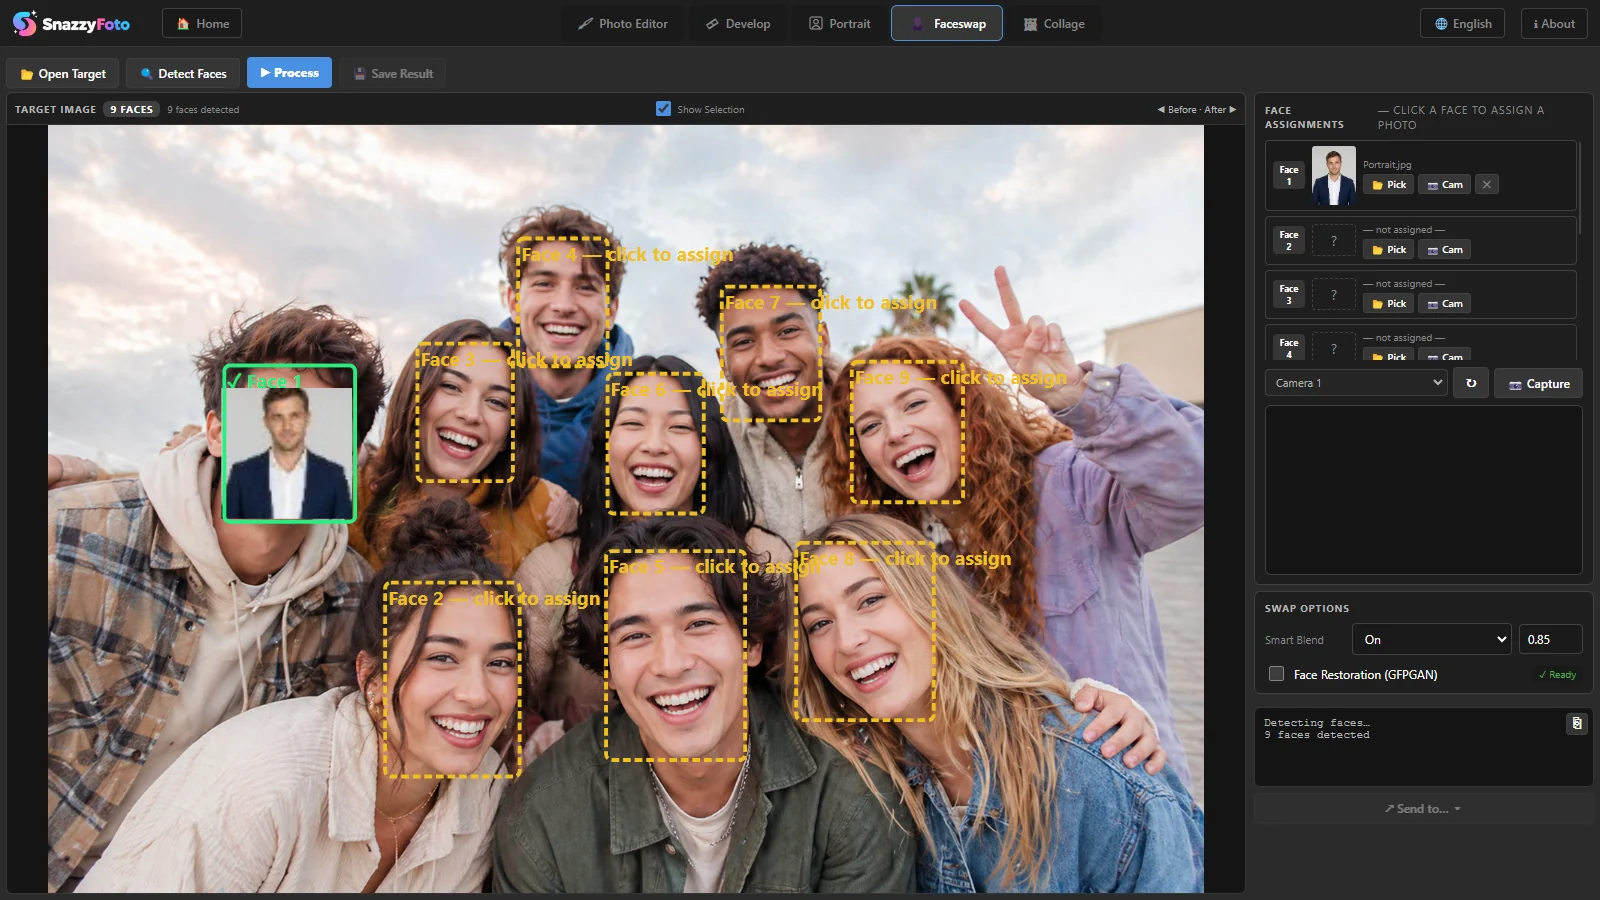 12345
1. Open the target
Click the Faceswap tab at the top, then 📂 Open Target 1 (or Open Target Image in the middle) and pick the photo (JPG, PNG, WebP, BMP or GIF). You can also drag a photo from File Explorer onto Faceswap. The photo appears on the left, under Target Image.
2. Find the faces
Click 🔍 Detect Faces 2. After a few seconds, a yellow dashed box appears on every face 3, labelled Face 1 — click to assign, Face 2 — click to assign and so on. The faces are numbered from left to right. The number of faces found is shown above the photo.
Untick Show Selection above the photo to hide the boxes for a moment.
3. Choose a new face for each person
Click a box on the photo, or 📂 Pick next to that face in the Face Assignments list 4, and pick the face photo. The box turns green with a ✓ and a small picture of the new face, and the list shows the file name.
- You don't have to give every face a new one. Faces with — not assigned — stay as they are.
- Click ✕ in the list to take a face photo off again.
- If the face photo shows several people, the leftmost face in it is used. For the best result, use a photo of one person.
Use your webcam instead
You can also take the new face with your webcam:
- Click 📷 Cam next to the face in the list. The webcam picture appears under the list. (Choose another camera in the list next to 📷 Capture, or click ↻ to look for cameras again.)
- Look into the camera and click 📷 Capture. The picture is taken and used for that face.
If you click 📷 Capture while the webcam is off, the first click switches it on; click again to take the picture. A picture taken this way goes to the next face that has no photo yet.
4. Process
Set the swap options if you like, then click ▶ Process 5. The screen shows Swapping faces... while the AI works. Each face takes a moment, so a group photo takes longer than a single face; face restoration adds a little more time.
Swap options
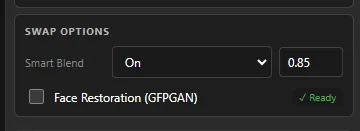 123
- 1 Smart Blend — On keeps the top of the original face (the forehead and hairline) and fades softly into the new face. Hair, fringes and hats then stay natural. Off replaces the whole face.
- 2 The blend number (from 0 to 0.99, normally 0.85) — how much of the new face is used, measured from the chin up. At 0.85 the top 15% of the face stays as it was. A lower number keeps more of the original forehead. It only counts when Smart Blend is On.
- 3 Face Restoration (GFPGAN) — after the swap, a second AI sharpens the faces and cleans up blur. Turn it on when the new face looks soft. The label next to it says ✓ Ready; if it says ⚠ Missing, see the questions below.
Look at the result
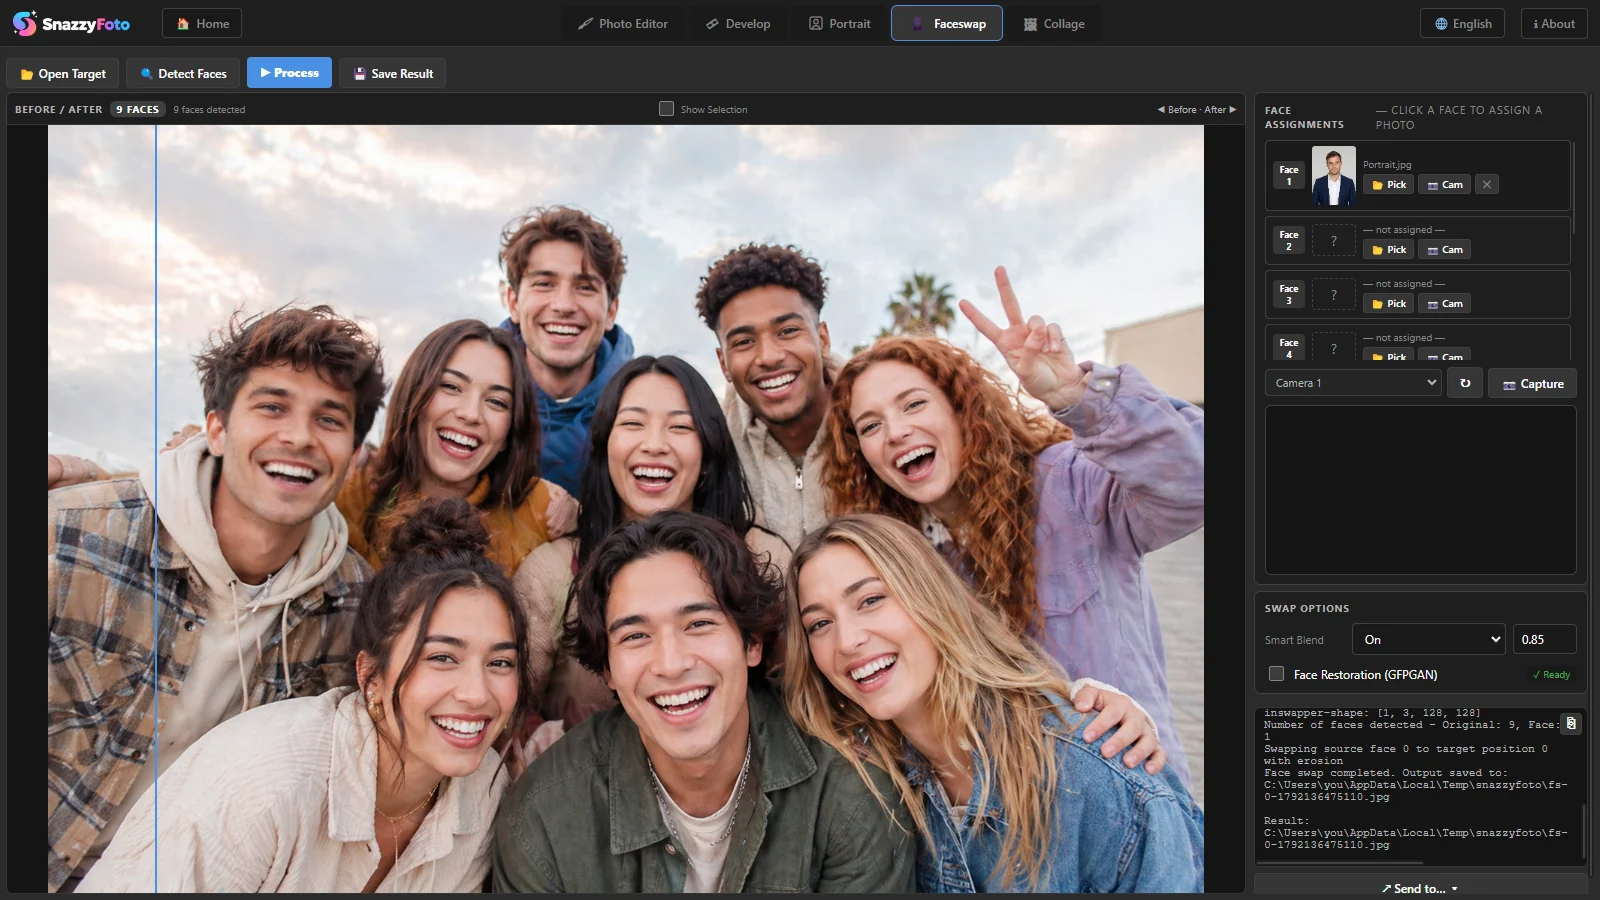 1234
- 1 Before and after — the heading changes to Before / After. Drag the handle left and right: the original is on the left of it, the result on the right. Click the picture to see it larger; there the mouse wheel zooms and dragging moves it.
- 2 💾 Save Result — saves the result as a JPEG. Choose a folder and a name (it suggests
faceswap-result.jpg) and click Save. It is saved at the full size of the target photo. - 3 ↗ Send to… ▾ — carry on with the result in another module: the Photo Editor (to retouch it or add text), Develop (to fix light and colour), Portrait (a new background) or Collage. See Send a picture to another module.
- 4 The log — what the AI did, step by step. Click ⎘ (Copy log) to copy it, for example when you ask for help.
Not happy? Change the options or a face photo and click ▶ Process again. The swap always starts from the original target, so you can try as often as you like. Only the result you save is kept: click Save Result before you open another target.
In the free version
Faceswap opens in the free version, and Detect Faces works, so you can see what it finds. When you click Process, the Supporter feature window appears instead of the swap:
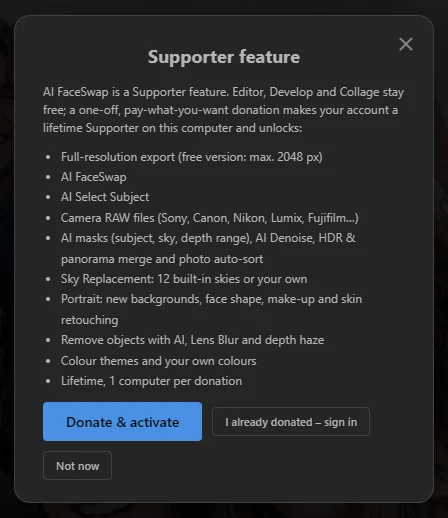 123
- 1 Donate & activate — opens your browser to donate. When you come back activated, click Process again.
- 2 I already donated – sign in — signs in with the account you donated with.
- 3 Not now — closes the window.
See Free and Supporter for how donating works.
Tips for a good swap
- Pick a face photo where the head is turned about the same way as in the target.
- Similar light helps: a face lit from the left looks odd on a person lit from the right. You can even out the colour afterwards in Develop: ↗ Send to… ▾ › Develop.
- A big, sharp face gives a better result than a tiny one from far away.
- Glasses, hands or hair in front of a face can confuse the AI. Try another photo if the result looks wrong.
Questions
It says "No faces detected."
The AI could not find a face it was sure about. Faces that are very small, turned far away, covered or in deep shadow are often missed. Try a photo where the faces are bigger — for example crop a large group photo closer in Develop first, then send it on — or brighten a dark photo first.
Some people in the group photo have no box.
Those faces were too small or too turned for the AI. Crop the photo so the people are bigger, and detect again. You can still swap the faces that were found.
Face Restoration is greyed out and says "Missing".
The face restoration model is missing, for example because an antivirus removed it. The swap itself still works without it. In current versions the model is one of the AI downloads and is downloaded the first time you use face restoration; in ℹ About › AI downloads… you can download it again. Otherwise install SnazzyFoto again from the Download page to get it back.
The new face comes from the wrong person in my face photo.
When a face photo shows several people, Faceswap uses the leftmost face. Crop the face photo to the one person you want (in the Photo Editor or Develop), save it, and pick that file instead.
The log shows an error.
Click ⎘ to copy the log. If it says a file was not found, see Fixing common problems. If it says Faceswap is a Supporter feature, your licence is not active on this computer: open Help › Support SnazzyFoto… in the Photo Editor and check it.