
Your first video
A complete beginner's walk-through: bring in your clips, cut out what you don't want, add a title, music and a transition, and export.
This tutorial takes you from a few video files to a finished video in about ten minutes. You will put the clips on the timeline, cut out a part you don't want, add a title, music and a transition, and export the result. Use any short clips from your phone or camera.
Made a mistake? Press Ctrl + Z to undo it. You can undo as many steps as you like, so feel free to try things.
1. Bring in your clips
Open SnazzyCut. On the Home screen, drag your video files from File Explorer onto Start with my files, or click it and pick them.
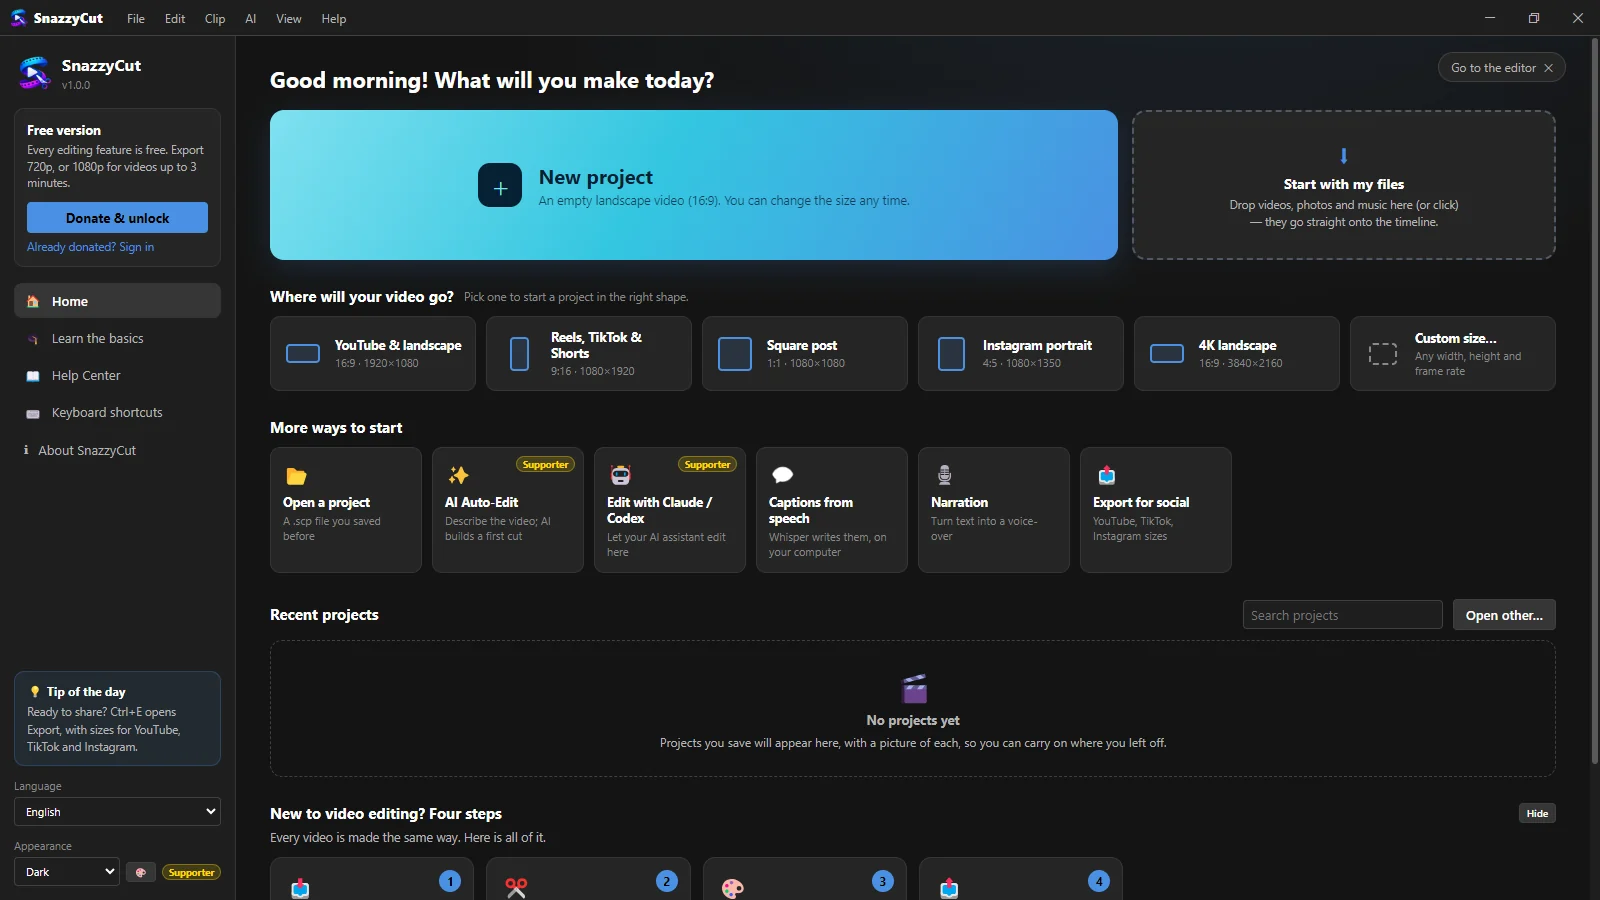 1
SnazzyCut makes a new project in the shape of your first video and puts all the clips on the timeline, one after another, in file-name order.
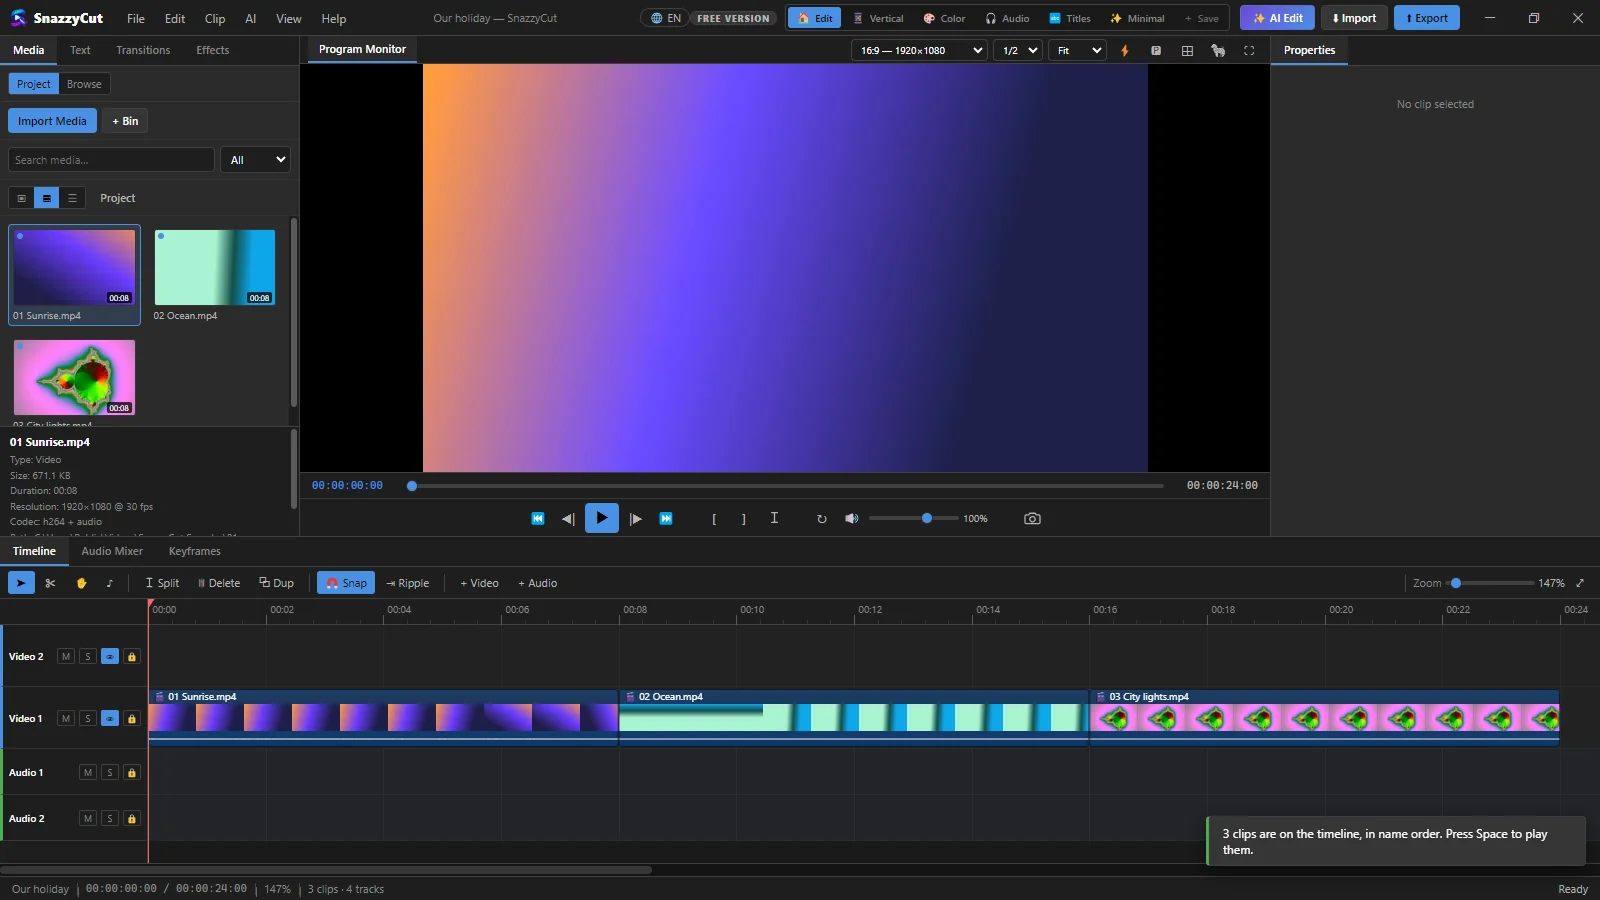 1234
- 1 Your files, in the Media panel.
- 2 The same files as clips on the timeline, on the Video 1 track.
- 3 A message says how many clips were added.
- 4 The play button.
Already in the editor? Click Import at the top, pick your files, then drag them from the Media panel down onto the timeline.
2. Watch it
Press Space to play the video, and Space again to pause. The red line moving along the timeline is the playhead: whatever is under it is what the monitor shows.
- Press Home to jump back to the start.
- Click in the row of times at the top of the timeline to move the playhead there.
- ← and → move one frame at a time, for finding the exact moment.
If Space types a space into a box instead of playing, click on an empty part of the timeline first.
3. Cut out a part you don't want
Say the end of your second clip is shaky and you want it gone. You split the clip where the good part ends, then delete the piece after it.
- Move the playhead to where the unwanted part starts.
- Click the clip to select it. It gets a white outline.
- Press S, or click Split above the timeline. The clip is now two clips, and the piece after the playhead is selected.
- Press Delete, or click Delete. The piece is gone.
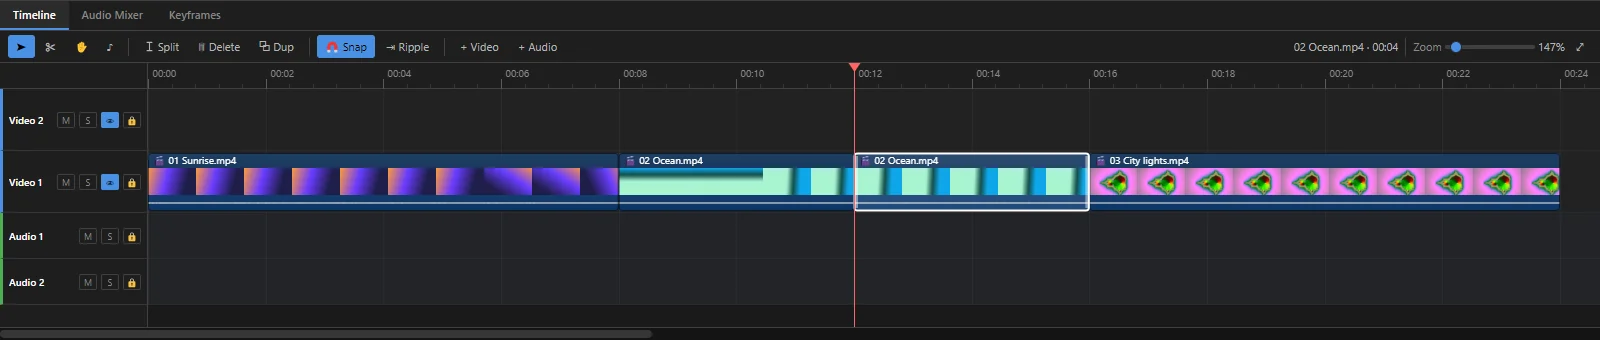 12
- 1 Split — cuts the selected clip at the playhead (S).
- 2 Delete — removes the selected clip (Delete).
Delete leaves an empty gap where the piece was, and a gap plays as black. To remove the piece and close the gap, press Shift + Delete instead (Ripple Delete). Already left a gap? Edit › Close All Gaps (Ctrl + G) closes it.
When no clip is selected, S splits every clip under the playhead, on every track, music included. Select the clip first if you only want to cut that one.
To shorten a clip without splitting it, drag its start or end edge. See Timeline basics for more ways to cut and trim.
4. Add a title
- Move the playhead to where the title should appear, for example near the start.
- Click the Text tab on the left, then + Add Text.
- In Content, replace Your text here with your own words.
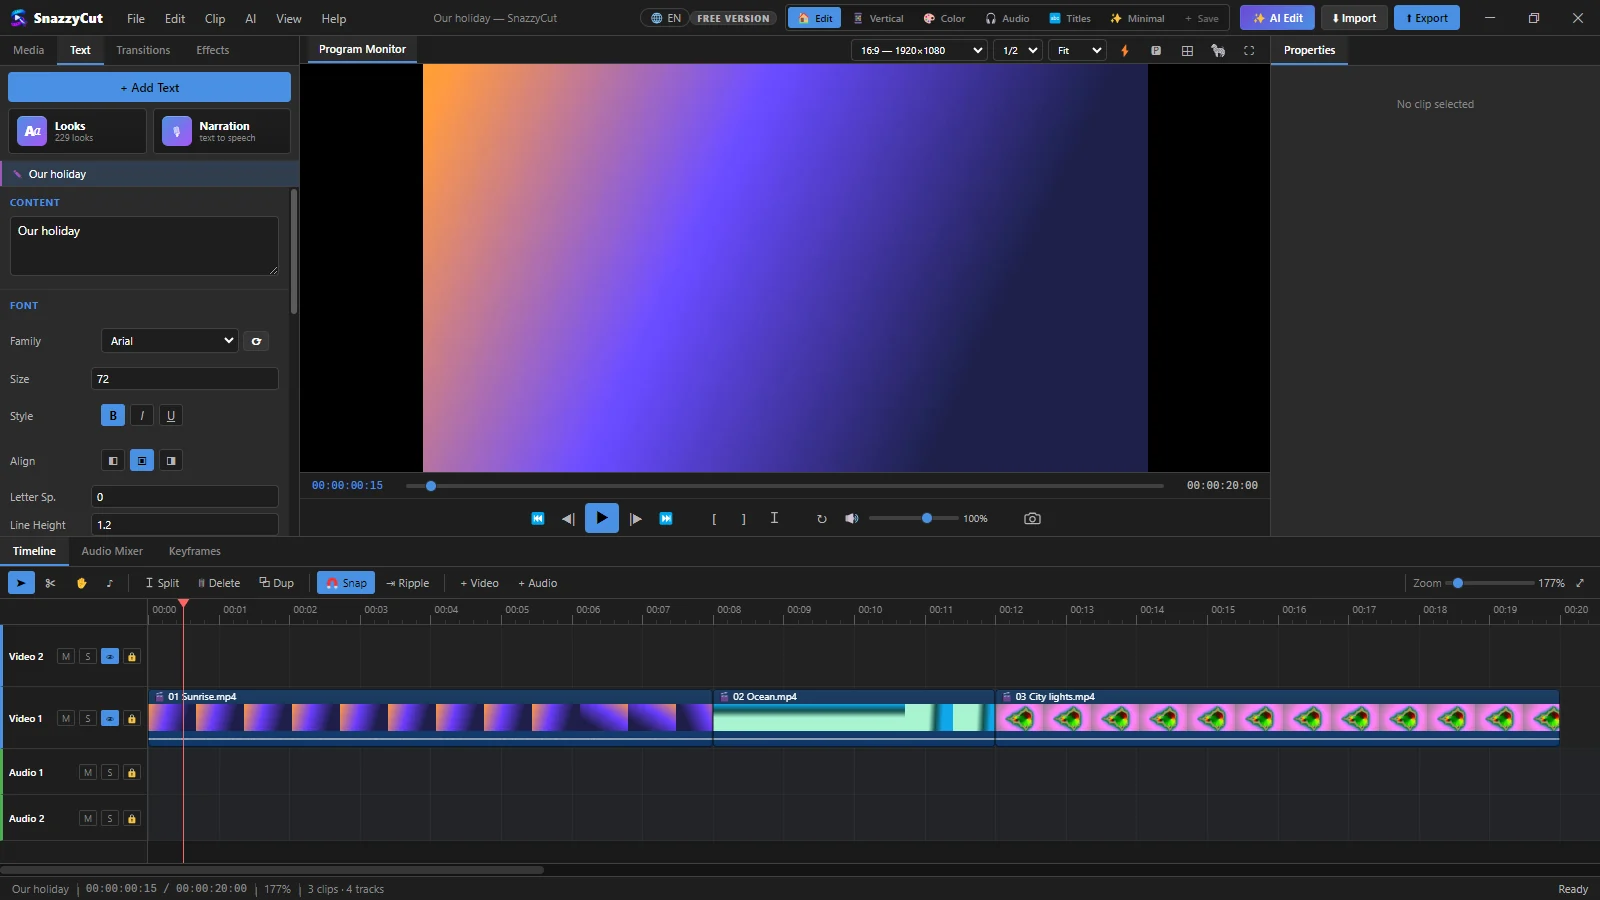 123
- 1 The Text tab.
- 2 + Add Text starts a new title.
- 3 Content — type your title here. The settings below it change the font, size and colours.
Scroll to the bottom of the panel to finish:
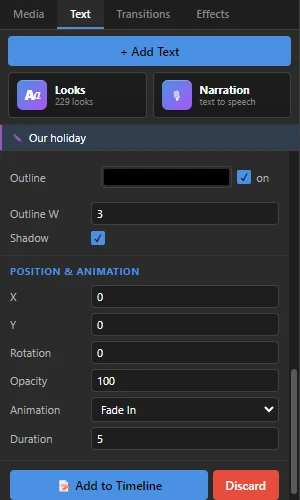 12
- 1 Duration — how many seconds the title stays on screen. Above it, Animation sets how it appears; Fade In is a good start.
- 2 Add to Timeline — puts the title on the top video track (Video 2) at the playhead, over your video. If something is already there, SnazzyCut adds a new track on top for it.
To change the title later, click it on the timeline: Properties gets a Text tab. For ready-made title styles, try Looks in the Text panel. More in Text and titles.
5. Add music
- Click Import at the top and pick a music file (MP3, WAV and others). It appears in the Media panel.
- Drag it from the Media panel down onto the Audio 1 track, at the very start. With Snap on, it sticks to the start by itself.
- Your clips have their own sound too, so the music may be too loud. Click the music clip on the timeline to select it.
- In Properties on the right, click the Audio tab and lower Volume. 100 is the music as it is; try 30 to 50.
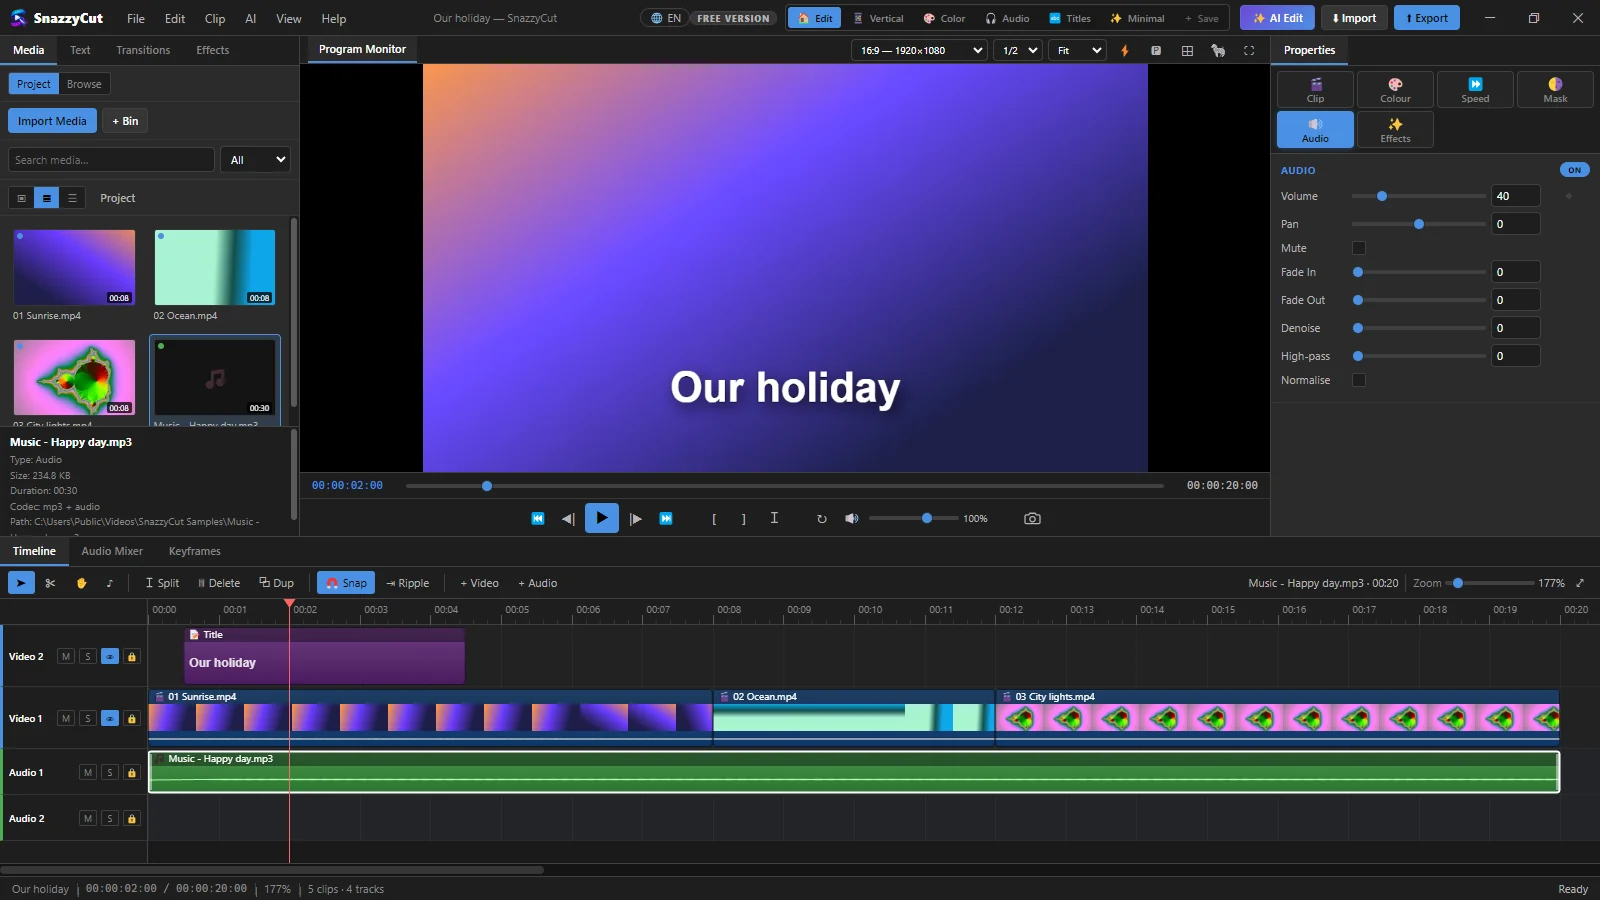 1234
- 1 Import.
- 2 The music file in the Media panel.
- 3 The Audio tab in Properties.
- 4 Volume — drag the slider or type a number.
Is the song longer than your video? Drag the right edge of the music clip to the end of your last video clip. Then set Fade Out (in the same tab) to 2 or 3 seconds so it ends softly. More in Audio and music.
6. Add a transition
A transition replaces the hard cut between two clips with something smoother, like a dissolve, where one picture slowly turns into the next.
- Click the Transitions tab on the left.
- Click a transition to see it played on your own footage in the monitor. Click it again to stop.
- Drag the one you like (for example Dissolve in Basic) onto the place on the timeline where two clips meet.
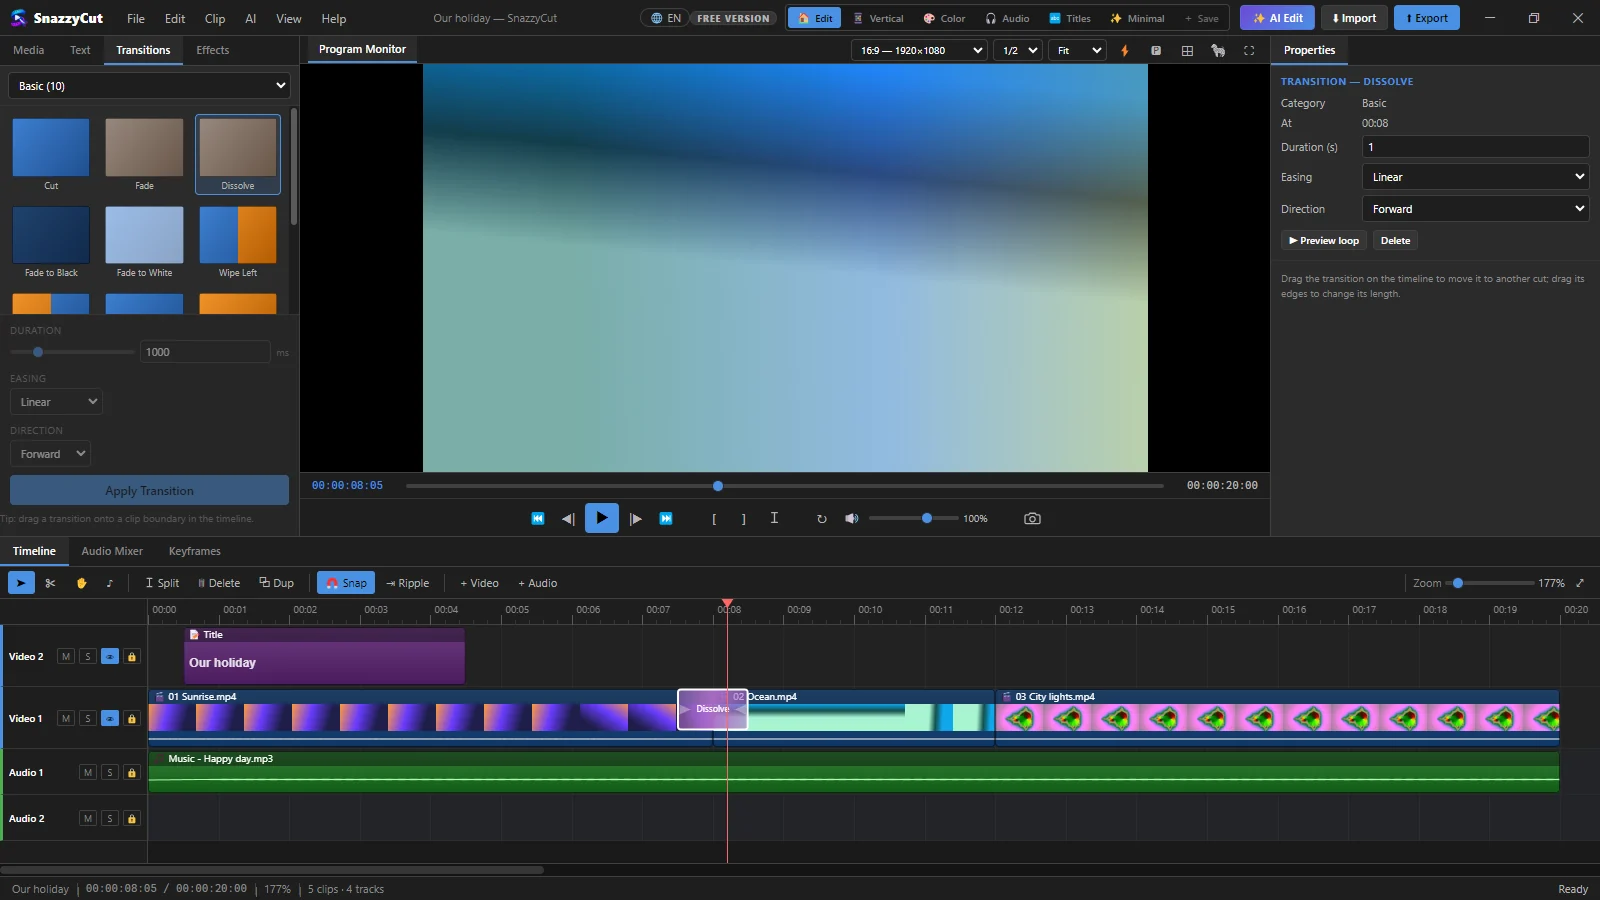 123
- 1 The Transitions tab. The menu at the top picks a group of transitions.
- 2 Dissolve, a calm choice that suits almost anything.
- 3 Click the transition on the timeline and its settings appear in Properties: its length in seconds, and Delete to remove it.
More in Transitions.
7. Save your project
Press Ctrl + S (or File › Save Project), choose a folder and a name. Your edit is saved as a SnazzyCut project (.scp), so you can open it and change it later. Keep your video files where they are: the project points to them, it does not copy them. See Projects and autosave.
8. Export your video
- Click Export at the top right (or press Ctrl + E).
- Check the settings below, then click Export in the dialog.
- If you didn't choose a file name, SnazzyCut asks where to save the video.
- Wait while it exports. A progress bar shows how far it is and how long is left.
- When ✅ Export Complete appears, click Open Video to watch it, or Show in Folder to find the file.
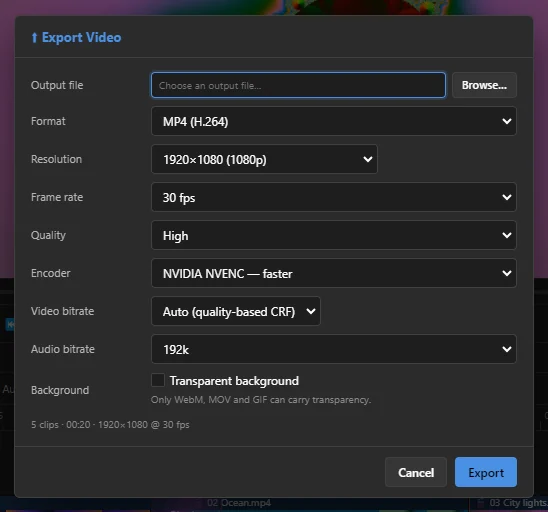 1234
- 1 Output file — click Browse… to choose a name and folder.
- 2 Format — MP4 (H.264) plays everywhere: phones, YouTube, TikTok, Instagram. Keep it.
- 3 Resolution — the size of the video. It starts at your project's size, here 1920×1080. The free version exports 1080p for videos up to 3 minutes and 720p for longer ones; sizes marked 🔒 Supporter need a donation (see What the free version exports).
- 4 Export — starts the export.
Making a video for Reels, TikTok or Shorts? Start the project with Reels, TikTok & Shorts on the Home screen so it is upright (9:16) from the beginning. See Start a project in the right shape.
That's it: you have made your first video. To learn every export option, see Export.